The Power of WhatsApp Marketing for Brands: A Game Changer
Today, brands constantly bombard customers with emails, calls, and social media ads. It can be hard to stand out from the noise and connect with customers in a meaningful way. But what if there was a way to reach customers directly on a platform they already use and love?
Enter WhatsApp marketing. With a staggering 85% of customers preferring to receive brand updates and communications via WhatsApp, it’s no surprise that it’s becoming a game-changer for marketers.
This blog covers how you can leverage the power of WhatsApp marketing with Dynamics 365 Customer Insights using WhatsApp4Dynamics, with a fictional example of a beauty brand called A&B Organics.
A&B Organics Leverages WhatsApp4Dynamics
A&B Organics’ marketing team wanted to leverage the growing popularity of WhatsApp and its potential to reach customers on a more personal level.
However, being a Dynamics 365 CRM user, they did not want fragmented communication channels. They wanted something that could be integrated into their existing system and did not require additional training for their users. This is where Inogic’s WhatsApp4Dynamics came into the picture.
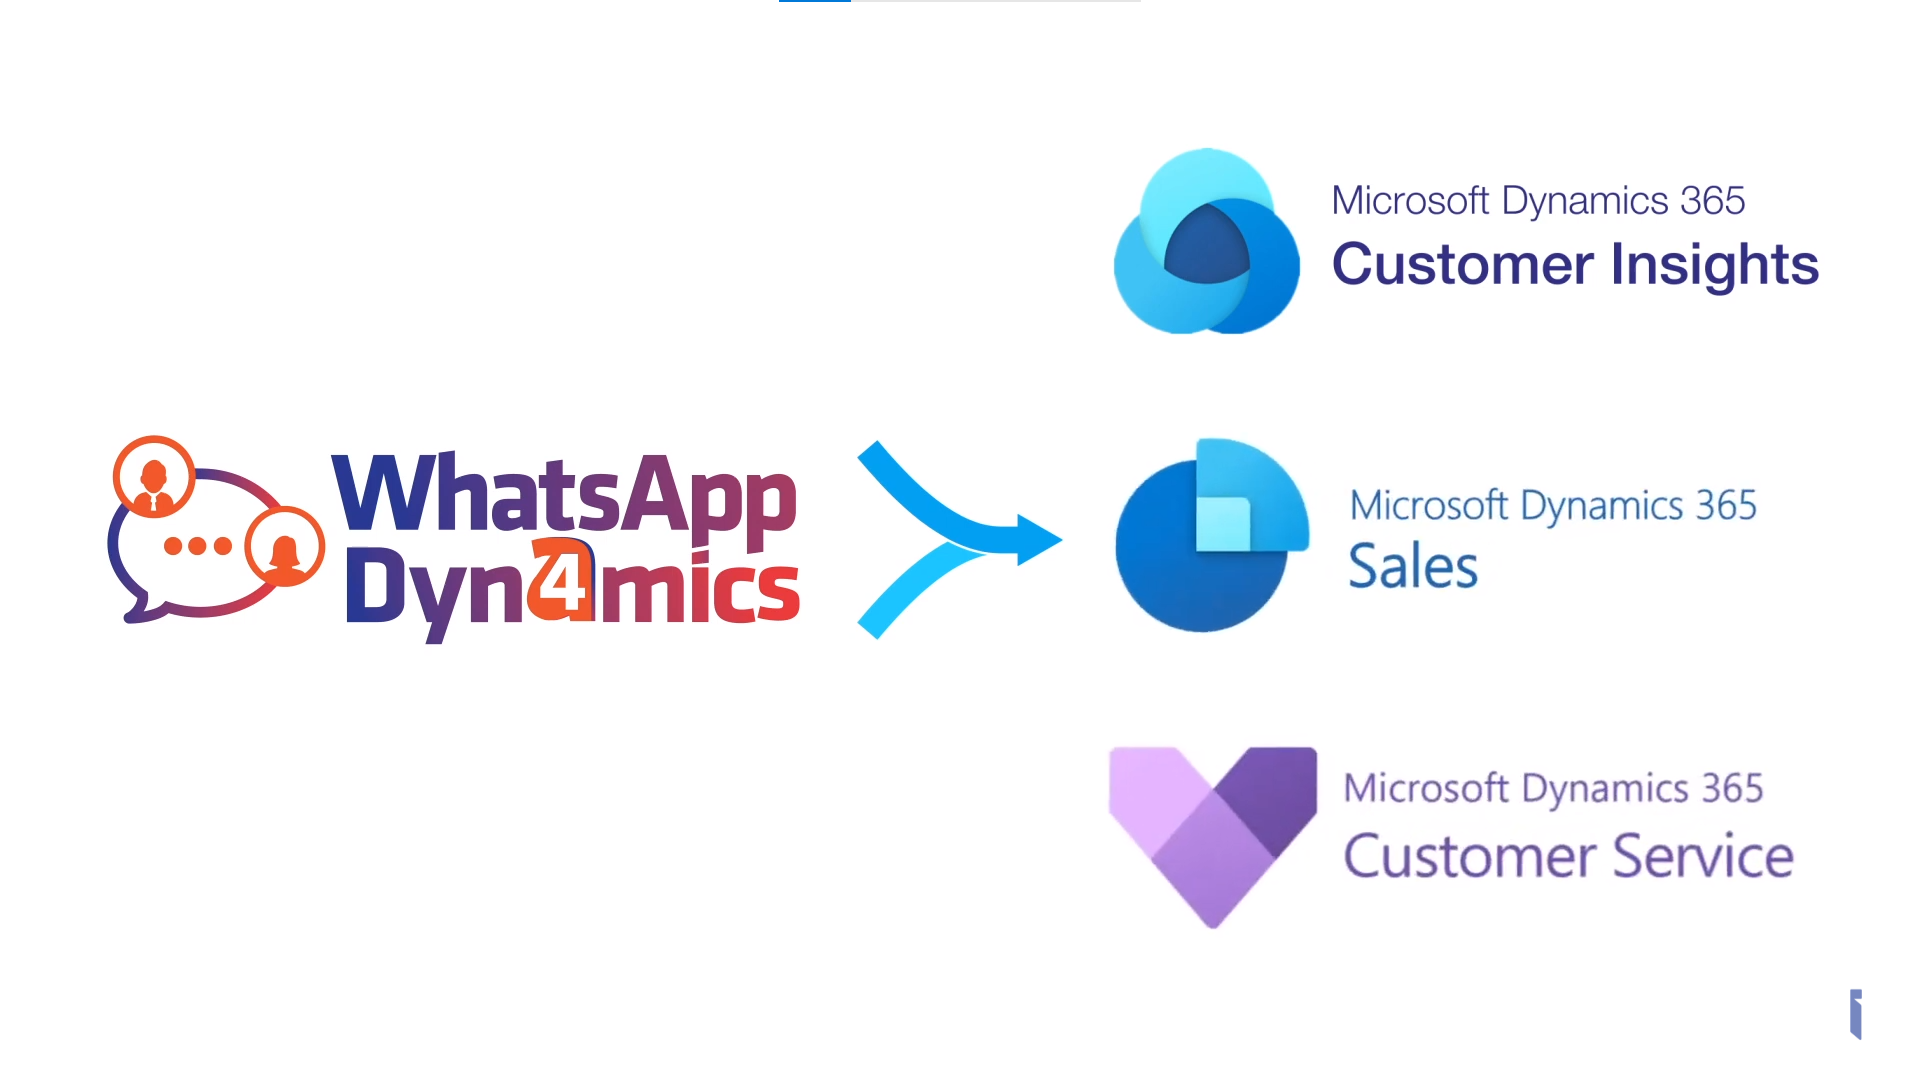
WhatsApp4Dynamics is a WhatsApp Integration app that integrates WhatsApp Business with Dynamics 365 Sales, Customer Insights and Customer Services.
As they were using Customer Insights for marketing, this low-code, no-code ISV app became just the solution they needed.
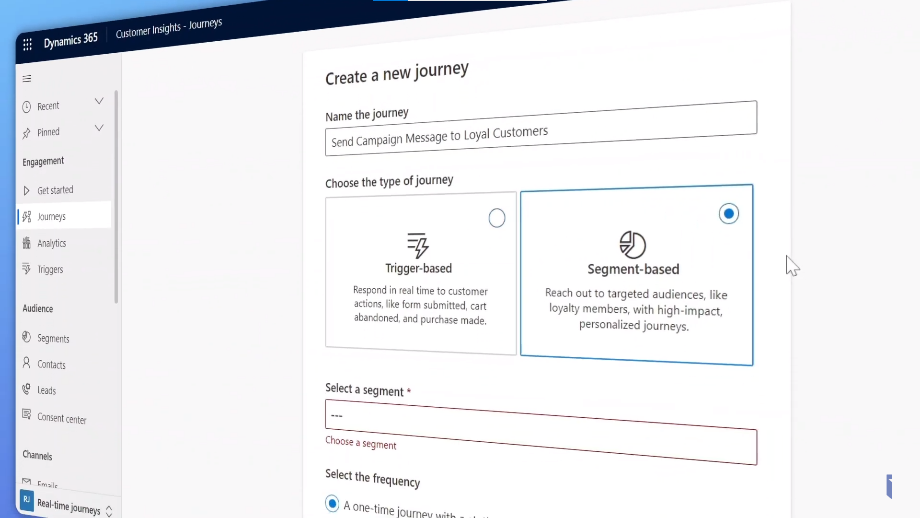
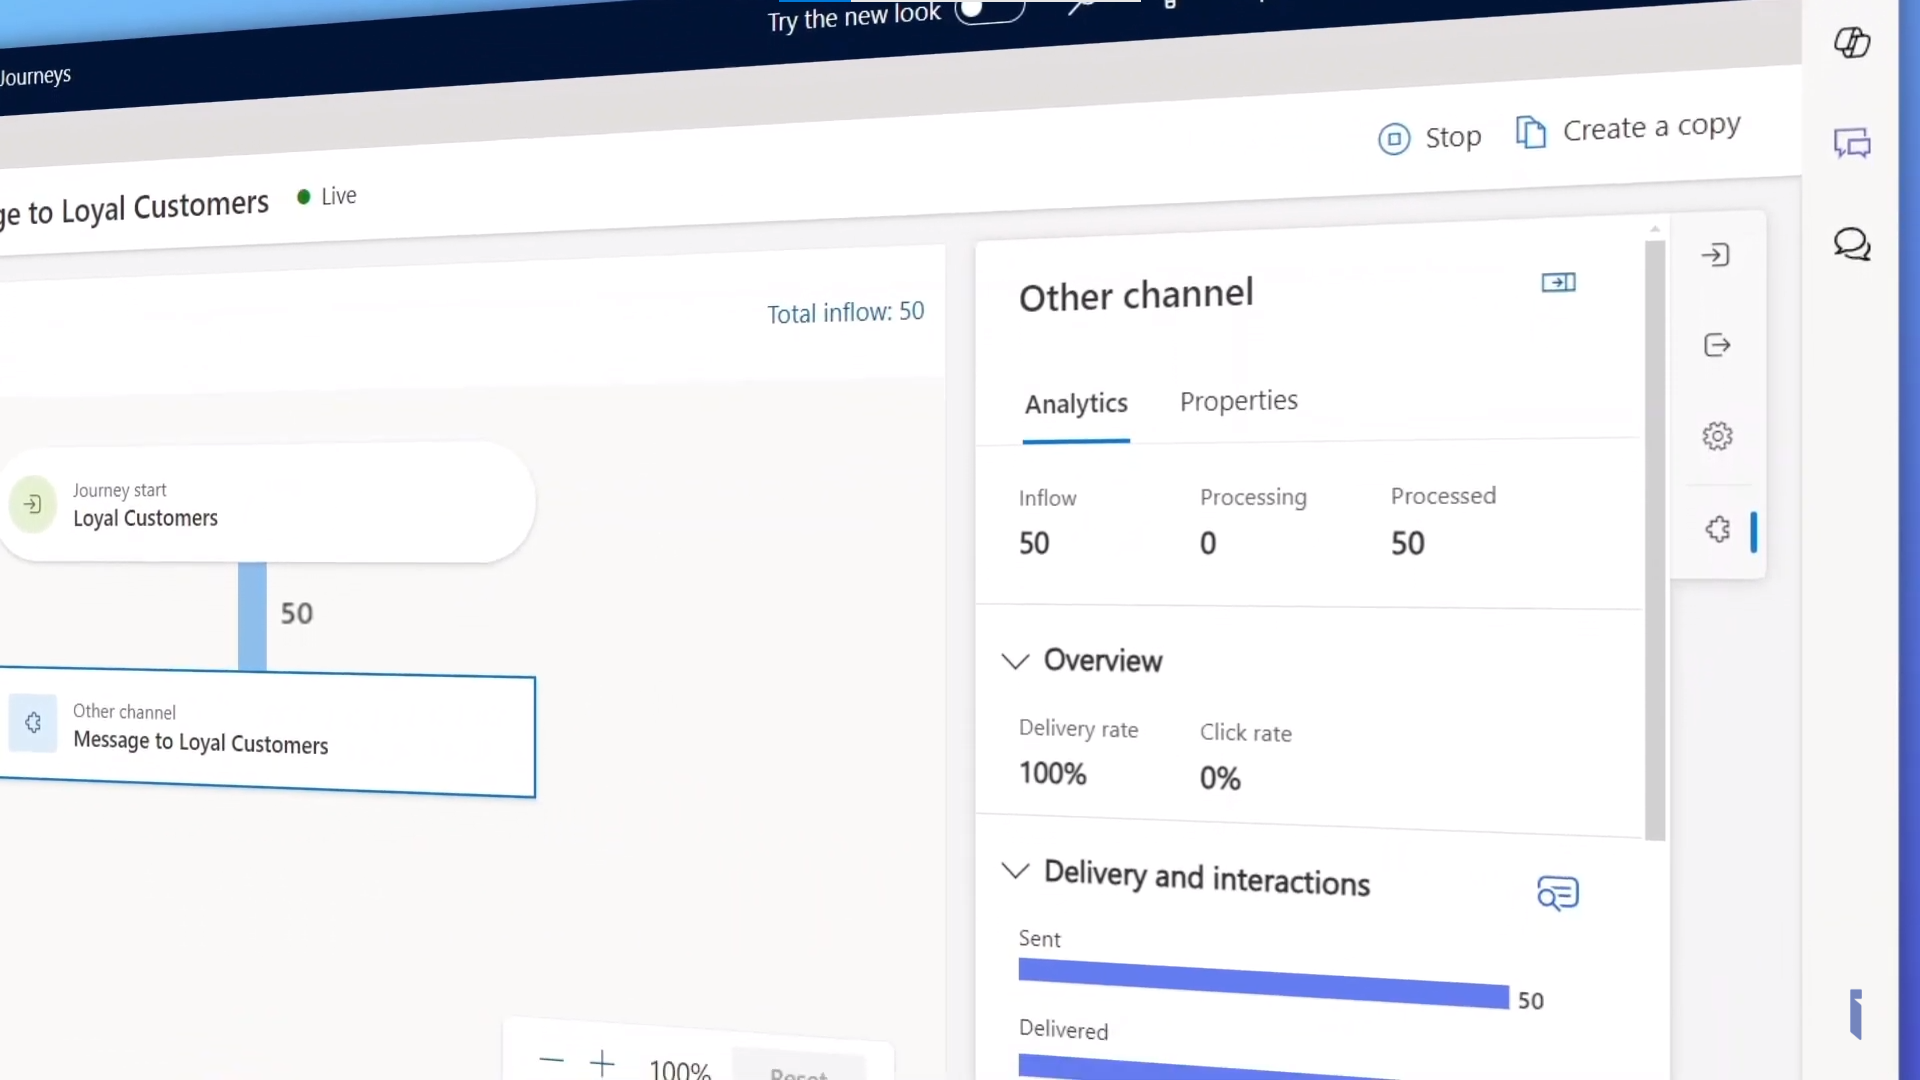
Robert, the new marketing lead at A&B Organics, wanted to let his loyal customers know about upcoming discounts and offers. He created a segment-based journey within his CRM campaign, targeting loyal customers. This strategic approach helped boost engagement rates and elevate campaign performance.
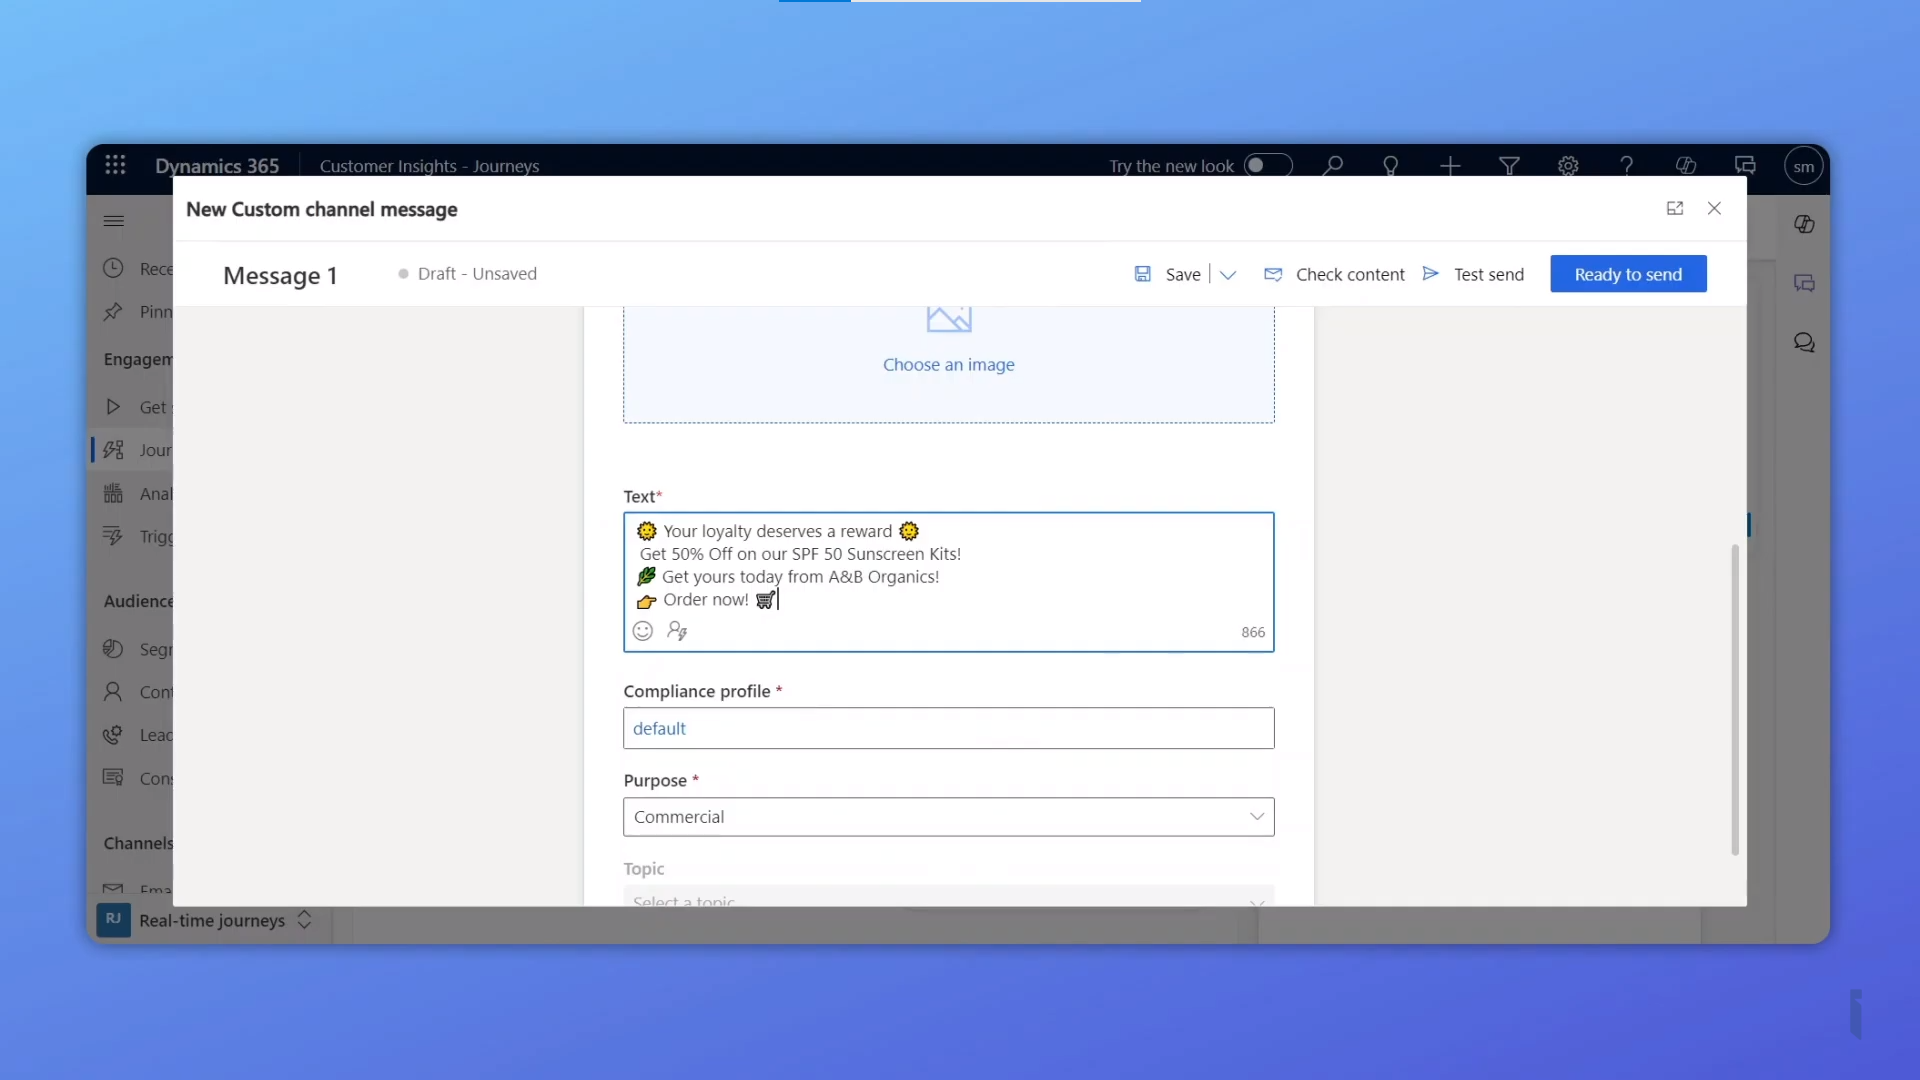
Robert strategically integrated relevant emojis throughout his bulk messaging. This helped him connect with customers on a more personal and familiar level.
Monitor Campaign Performance with WhatsApp4Dynamics Insights
WhatsApp4Dynamics provides valuable insights that Robert could access within the journey to monitor the campaign’s success and delivery statistics. This allowed him to track important metrics and adjust as needed.
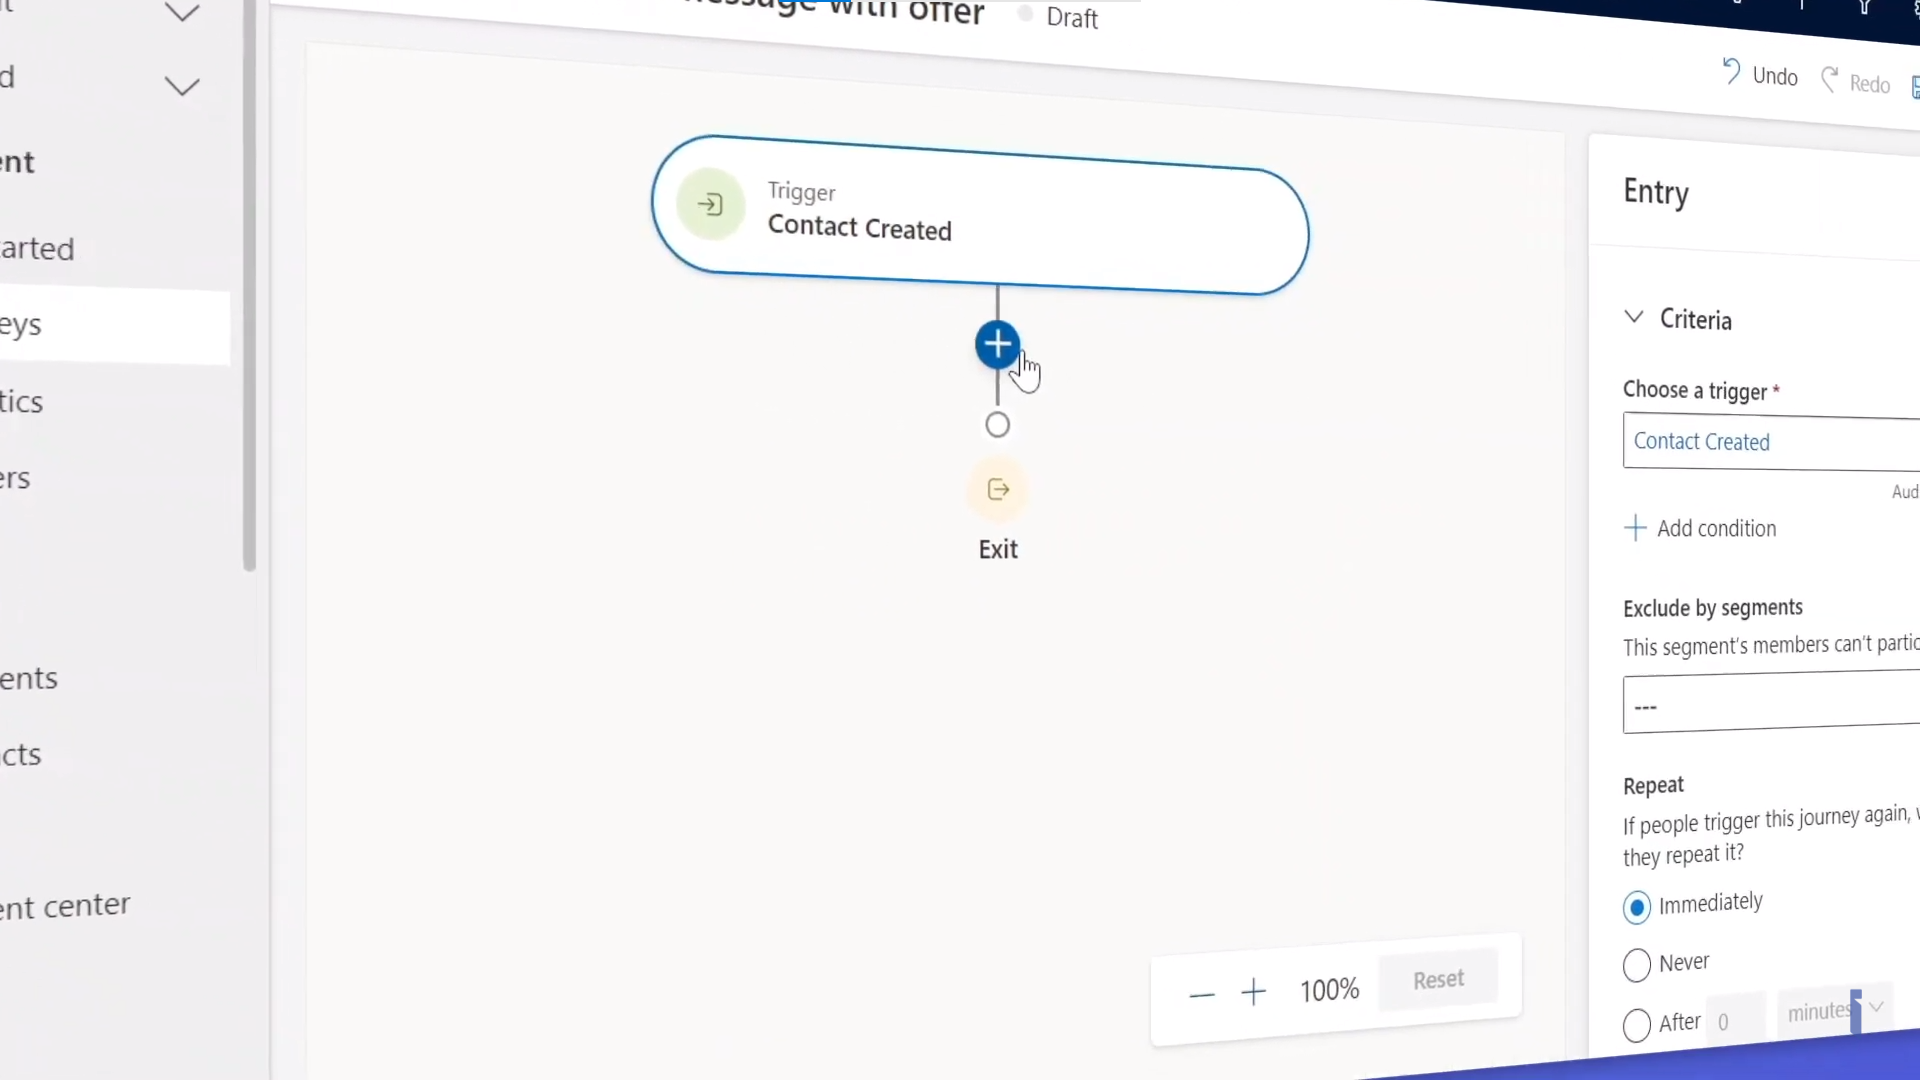
Robert also created a new trigger-based journey for WhatsApp contacts. This powerful feature made possible by WhatsApp4Dynamics ensures that whenever a new customer is added to CRM, a welcome message with a campaign update is automatically sent to them on WhatsApp. This is just one approach, there are numerous ways you can benefit from this feature.
A Resounding Success
The WhatsApp marketing campaign proved to be a resounding success for Robert and his marketing team. They achieved a significant 5x increase in product inquiries, demonstrating the power of this innovative marketing strategy.
Ready to Explore WhatsApp Marketing?
This blog post just scratched the surface of the numerous features available in WhatsApp4Dynamics.
To learn more about how you can leverage WhatsApp marketing to take your customer engagement to the next level, watch our video showcasing how A&B Organics sales team efficiently handles incoming inquiries using WhatsApp4Dynamics for Dynamics 365 Sales.
Download WhatsApp4Dynamics today from Microsoft AppSource or the Inogic website. Don’t hesitate to connect with our product experts at crm@inogic.com to discuss your specific needs and explore how WhatsApp marketing can help your brand achieve its goals.
Clearing the AB‑730: AI Business Professional certification has been one of the most rewarding learning experiences in my AI journey. This exam is designed for professionals who want to understand how to use Microsoft Copilot, Agentic AI, and AI‑driven business workflows to solve real‑world problems.
In this post, I’m sharing my preparation path, key takeaways, and practical tips that will help anyone planning to take AB‑730.
Why I Chose AB‑730:
As someone deeply involved in Microsoft 365, Power Platform, and AI‑driven productivity, AB‑730 felt like the perfect certification to validate my skills. It focuses on:
Applying Copilot in day‑to‑day business scenarios
Understanding AI capabilities across Microsoft 365
Choosing the right Copilot for the right task
Improving workflows using AI reasoning and orchestration
It’s not a technical exam – it’s about practical AI usage, decision‑making, and business impact.
My Preparation Path
I followed the official Microsoft Learn certification path, which is more than enough to prepare you thoroughly. The learning modules are structured, scenario‑based, and aligned directly with the exam.
What I used:
Microsoft Learn AB‑730 learning path
Microsoft AB 730 free Practice Assessment (which has 50 questions)
Hands‑on practice with Microsoft 365 Copilot
Real business scenarios from my daily work
The Learn modules helped me understand the concepts, but the real confidence came from using Copilot in real workflows – writing emails, analyzing data, summarizing documents, and automating tasks.
AB 730 and AB 731 Certification Course completed on Technofocus | Skill Up with Level Up with a Test. This helped me a lot to gain more knowledge on the exam.
The exam focuses on practical understanding, not memorization. Expect questions around:
Choosing the right Copilot (M365 Copilot, Copilot Studio, Copilot Chat, etc.)
Identifying the best AI capability for a scenario
Understanding how AI reasoning improves business workflows
Recognizing governance and responsible AI considerations
Applying Copilot to solve business problems
If you’ve used Copilot in real scenarios, the exam feels intuitive.
My Key Takeaways
1. Copilot is more than a chatbot
The exam emphasizes Copilot as a reasoning engine that can analyze, summarize, generate, and orchestrate tasks.
2. Business context matters
Many questions test whether you can choose the right Copilot for the right scenario.
3. Governance and responsible AI are essential
Even though AB‑730 is business‑focused, you still need to understand the basics of data boundaries, safety, and compliance.
4. Real usage beats theory
Using Copilot daily helped me answer scenario questions confidently.
Tips for Anyone Preparing
Here’s what I wish I knew earlier:
Complete the Microsoft Learn path end‑to‑end — it covers everything.
Practice using Copilot in Word, Excel, Outlook, Teams, and Edge.
Focus on scenarios, not definitions.
Understand the differences between Copilot types (M365 Copilot, Copilot Studio, Copilot Chat, etc.).
Review governance basics – data access, boundaries, and responsible AI.
Don’t overthink – the exam is practical and straightforward.
Final Thoughts
AB‑730 is a fantastic certification for anyone who wants to become an AI‑empowered business professional. It validates your ability to use Copilot effectively, make informed decisions, and drive AI adoption in your organization.
If you’re already using Microsoft 365 Copilot or planning to, this certification is absolutely worth it.
Also, if you had not enrolled for the free certification voucher for this exam. Follow the below article and complete the course it before 31st May 2026.
Step 6: Paste the copied FetchXML in the FetchXML Input in the Arun Potti’s FetchXML formatter mentioned in the Step 1.
After the FetchXML input is provided, the tool automatically produces fully formatted JavaScript, C#, and Web API code snippets in the Generated Code section for the direct implementation.
Hope you have successfully downloaded the required FetchXML, provided the Input and saw all the outputs.
In the next article, will explain how to use them in real code JS, C# and Web API and get the desired results.
Please like and share your valuable feedback on this article. Also, follow my blog to get my articles to your Inbox.
Below are my earlier articles that you can have a look.
I recently released my first XRMToolBox plugin, “Dataverse Users, Security Roles, Teams and Teams Security Roles,” designed to help administrators, developers, and auditors easily explore detailed user access data within Microsoft Dataverse environments.
You can check the below articles in order for more details.
Step 1: Open XrmToolBox and search for “Dataverse Users, Security roles, Teams and Teams security roles” in Tools tab.
Click on it.
Step 2: Click on Yes to connect to an organization.
Step 3: Select the required connection and click on OK.
Tool has been opened successfully.
Step 4: Click on Load Data.
Tool will start retrieving all the System user details, Security roles (separated by semicolon ;), Teams (separated by semicolon and Team Security Roles (separated by semicolon ;).
Once, the Tool retrieves the data, you can see the data in the grid and also can see the number of users retrieved.
Step 5: Search for some text to filter the data.
As an example, I have entered the text “System Administrator“, and you can see the grid filtered with the entered text and can see the updated count as well.
If you want to sort, click on any column in the grid to sort ascending or descending.
As an example, I have clicked on Full Name to sort in Ascending order.
Step 6: Click on Export to export the data in CSV format.
Note: Data will be exported to the CSV format only on the filtered data, which you can see on this grid.
Step 7: Choose the required path and Provide the File name.
Click on Save.
Step 8: Once the data is exported successfully, you can see the Information message and the alert dialog with the Path, the file is downloaded.
Click on OK.
Step 9: Go to the Downloads folder and open the file to see the data.
Hope you liked my new XrmToolBox tool “Dataverse Users, Security roles, Teams and Teams security roles“.
Please like and share your valuable feedback on this article. Also, follow my blog to get my articles to your Inbox.
Click on the below image to navigate to my YouTube Channel.
Below are my earlier articles that you can have a look.
I have recently published my first XRMToolBox Plugin “Dataverse Users, Security roles, Teams and Teams security roles” related to Dataverse Security, which helps administrators, developers, and auditors retrieve and explore detailed user access information from Microsoft Dataverse environments.
You can check the below for the Overview, Key Features, Use Cases and Data Export of my Plugin.
Overview
This plugin provides a comprehensive view of Dataverse users and their access configurations, including:
User Details: UserId, ApplicationId, Full Name, Email, User Status, Business Unit, Azure AD Object ID etc.
User Security Roles (Separated by semicolon
User Teams (Separated by semicolon
Team Security Roles (Separated by semicolon
Key Features
Global Search: Use a single search box to find any text across all retrieved user fields
Column Sorting: Sort by any field for easier navigation and analysis
CSV Export: Export all data or filtered search results to a .csv file with a custom filename
Detailed Metadata: View additional fields like domain name, business unit ID, and application ID
Fast Performance: Optimized for large datasets with responsive UI
User-Friendly Interface: Intuitive layout with minimal setup required
Refresh Capability: Reload data without restarting the plugin with a single click
Offline Analysis: Exported data can be used for reporting, auditing, or compliance reviews
Use Cases
Security Audits: Identify users with elevated or missing roles
Compliance Reporting: Export user-role mappings for documentation
Team Management: Understand team memberships and inherited roles
Environment Cleanup: Detect inactive users or redundant access
Access Reviews: Analyze user metadata for governance and policy enforcement
Data Export
Click the Export button to download data as a .csv file
Choose your own filename
Export either full dataset or filtered results based on search
Hope you liked my new plugin in the XrmToolBox.
In the next article, will explain about how to install this plugin in the XrmToolBox.
Please like and share your valuable feedback on this article. Also, follow my blog to get my articles to your Inbox.
Click on the below image to navigate to my YouTube Channel.
Below are my earlier articles that you can have a look.
This is a quite common requirement from the business to send automated emails on some Dataverse record create/ update / delete using Microsoft No Code/ Low Code platform.
In this article, will explain about the below requirement step by step using Power Automate.
Requirement: Send an Email to Customer (Contact) when the contact record is created.
Step 15: Give the QueueId in Activity Party participationmask 1.
Place the cursor in the Contacts braces and Click on Insert dynamic content.
Step 16: Search for Contact and Click on Contact (Unique identifier of the contact).
After insertion,
Step 17: Enter the below text in the Description field. Place the cursor after Dear . Click on Insert Dynamic content.
Dear ,
Welcome to Arun Potti Corp! We’re excited to have you with us. Stay tuned for updates, insights, and exclusive content. Feel free to reach out with any questions—we’re happy to connect!
Best regards, Administrator
Step 18: Search for Full Name and Click on Full Name.
After insertion,
Step 19: Place the cursor on the Due Date and Click on Insert Expression.
Step 20: Enter the below expression and click on Add.
utcNow()
Step 21: Give the below text and place the cursor on Regarding (Contacts) in the braces. Click on Insert Dynamic content.
/contacts()
Step 22: Search for Contact and Click on Contact (Unique identifier of the contact).
After update,
Step 23: Give the below Subject.
Welcome to Arun Potti Corp!
Step 24: Click on Add a new row and update the Name to Create contact welcome email.
After update,
Step 25: Click on Save and after Save click on + icon to add new action.
Step 26: Search for Perform a bound action and click on it (Microsoft Dataverse -> Perform a bound action).
Step 27: Select the Table name as Email Messages. Choose the Action Name as SendEmail. Place the cursor in the Row IDfield. Click on Insert Dynamic content.
Step 28: Search for Email Message and Click on Email Message (Action: Create contact welcome email).
After insertion,
Step 29: Select the Item/IssueSend to Yes.
Step 30: Update the Action to Perform a bound action – Send Email and Click on Save.
Step 31: Once Power Automate is saved. Go to any Model-driven App. Create a new Contact record to test the welcome email flow.
Note: Make sure to provide the Email address when creating the Contact.
You will get the email once the flow executed successfully.
Hope you have successfully sent the email after creating the contact using Power Automate by following all the above steps.
Please like and share your valuable feedback on this article. Also, follow my blog to get my articles to your Inbox.
Click on the below image to navigate to my YouTube Channel.
Below are my earlier articles that you can have a look.

 Login
Login


 and Team Security Roles (separated by semicolon ;).


 Overview
 User Details:
  User Security Roles (Separated by semicolon
  User Teams (Separated by semicolon
  Key Features
 Global Search: Use a single search box to find any text across all retrieved user fields
 Column Sorting: Sort by any field for easier navigation and analysis
 CSV Export: Export all data or filtered search results to a
  Detailed Metadata: View additional fields like domain name, business unit ID, and application ID
 Fast Performance: Optimized for large datasets with responsive UI
 User-Friendly Interface: Intuitive layout with minimal setup required
 Refresh Capability: Reload data without restarting the plugin with a single click
 Offline Analysis: Exported data can be used for reporting, auditing, or compliance reviews
 Use Cases
 Security Audits: Identify users with elevated or missing roles
 Compliance Reporting: Export user-role mappings for documentation
 Environment Cleanup: Detect inactive users or redundant access
 Access Reviews: Analyze user metadata for governance and policy enforcement


