Microsoft 365 Copilot vs Copilot Chat: Key Differences for Dynamics 365 CRM Users
 Over the past few months, Copilot has become one of the most talked-about features in the Microsoft ecosystem. But one thing still confuses many people:
There are actually two different Copilot experiences available in Microsoft 365.
- Microsoft 365 Copilot – the paid add-on
- Copilot Chat – the free chat experience included with Microsoft 365
At first glance, they look almost identical. Both allow you to type prompts and get responses from AI.
However, when you try to use them in a real business scenario, especially inside CRM, the difference becomes very clear.
Recently, I experimented with both tools using a practical Dynamics 365 CRM scenario, and the results made the distinction crystal clear.
If you work in Sales, Customer Service, Consulting, or Project Delivery, this comparison will help you understand which Copilot actually makes a difference.
The Problem: AI That Can’t See Your Work
In most organizations, information about a customer is spread across multiple systems.
For example, in a typical CRM workflow you might have:
- Customer emails in Outlook
- Meeting notes from calendar events
- CRM notes and activities
- Service cases
- Tasks and follow-ups
- Internal discussions
- Documents and attachments
When you ask AI to summarize a customer opportunity or identify risks, it needs access to all of this context.
But not every Copilot has that visibility.
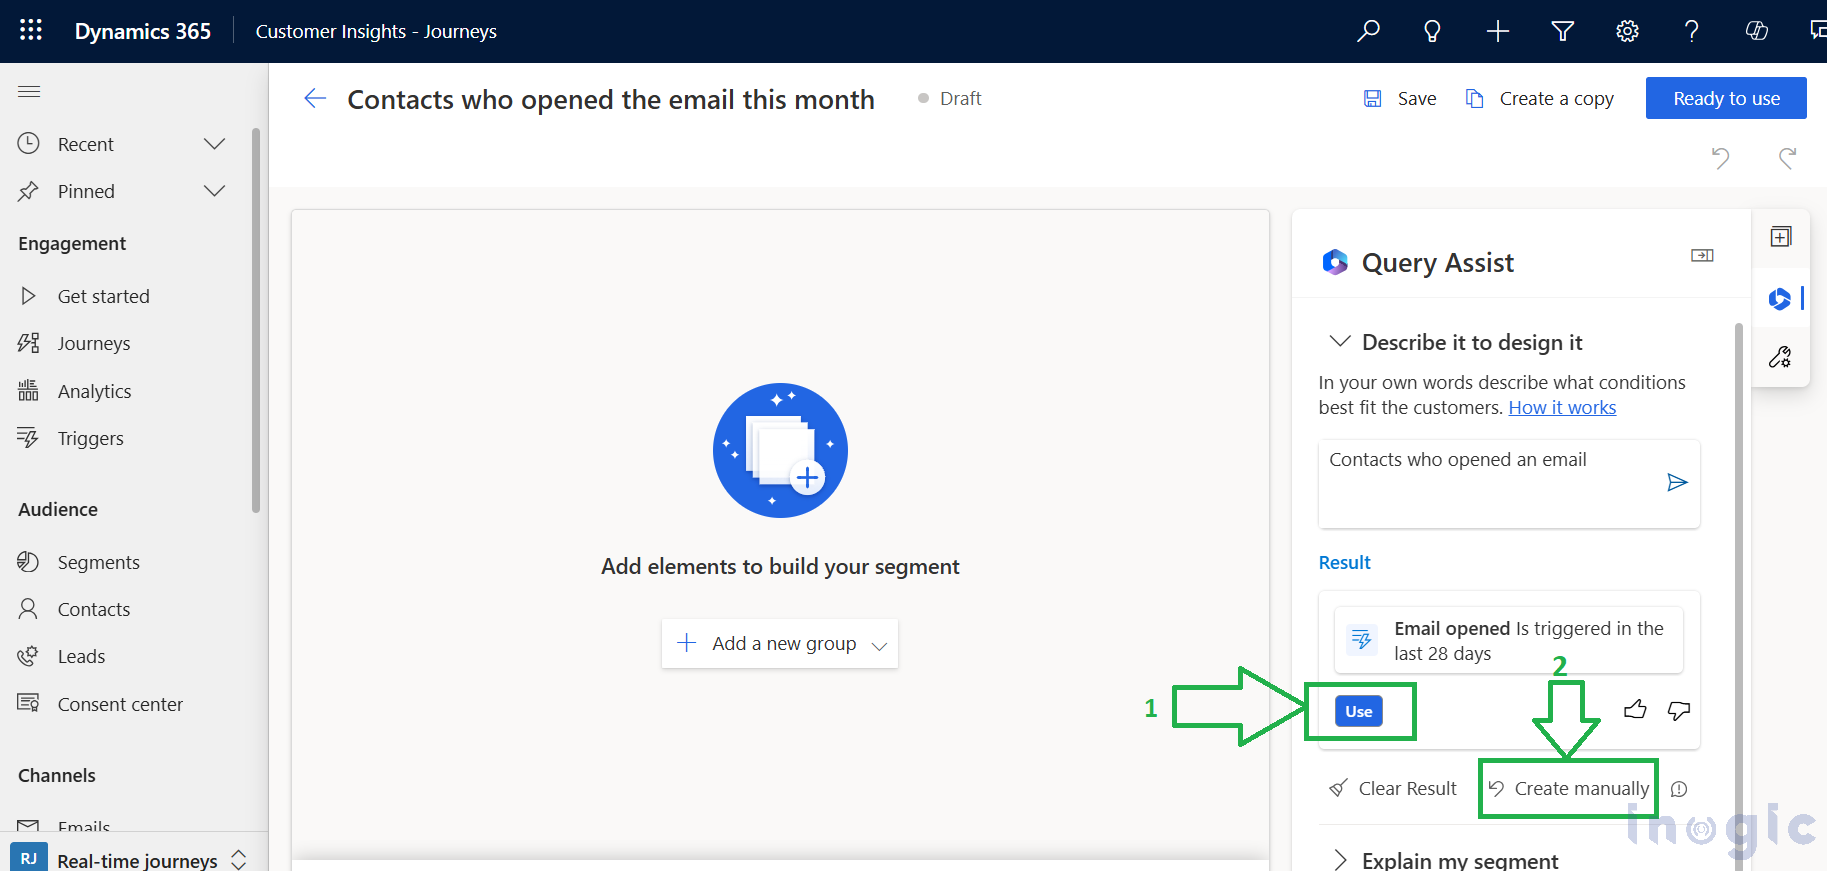
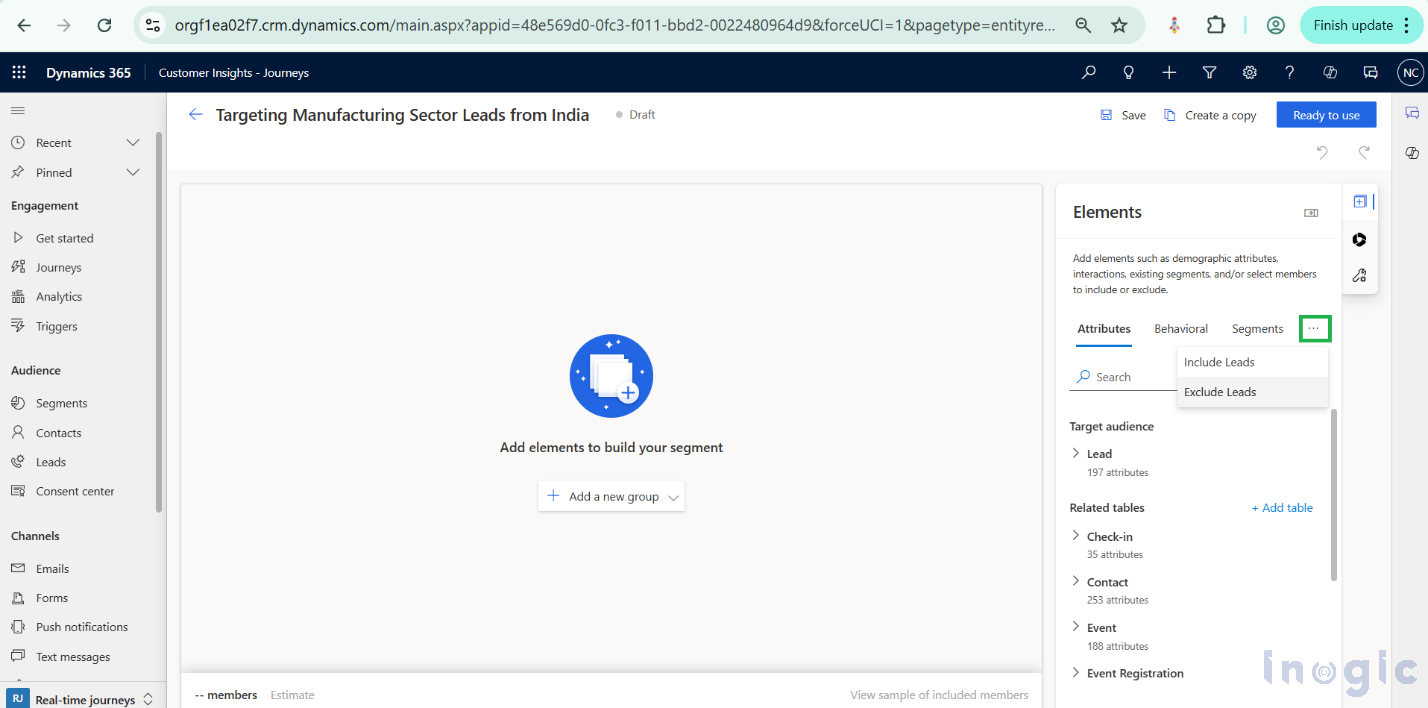
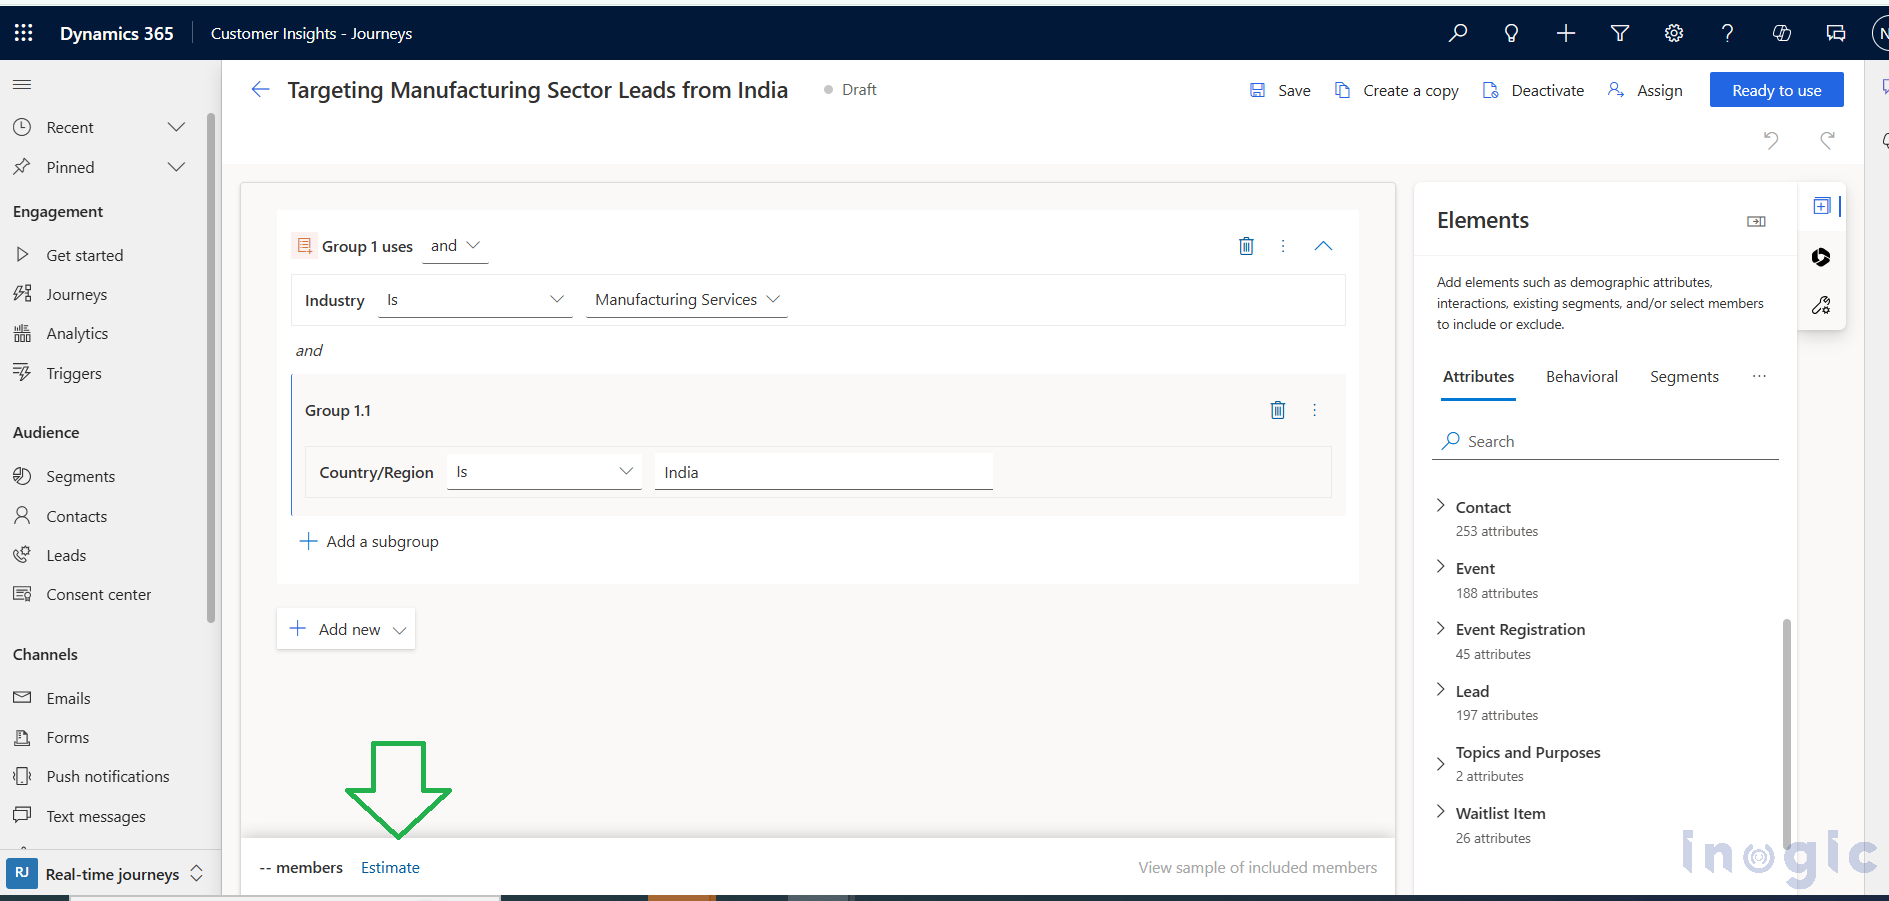
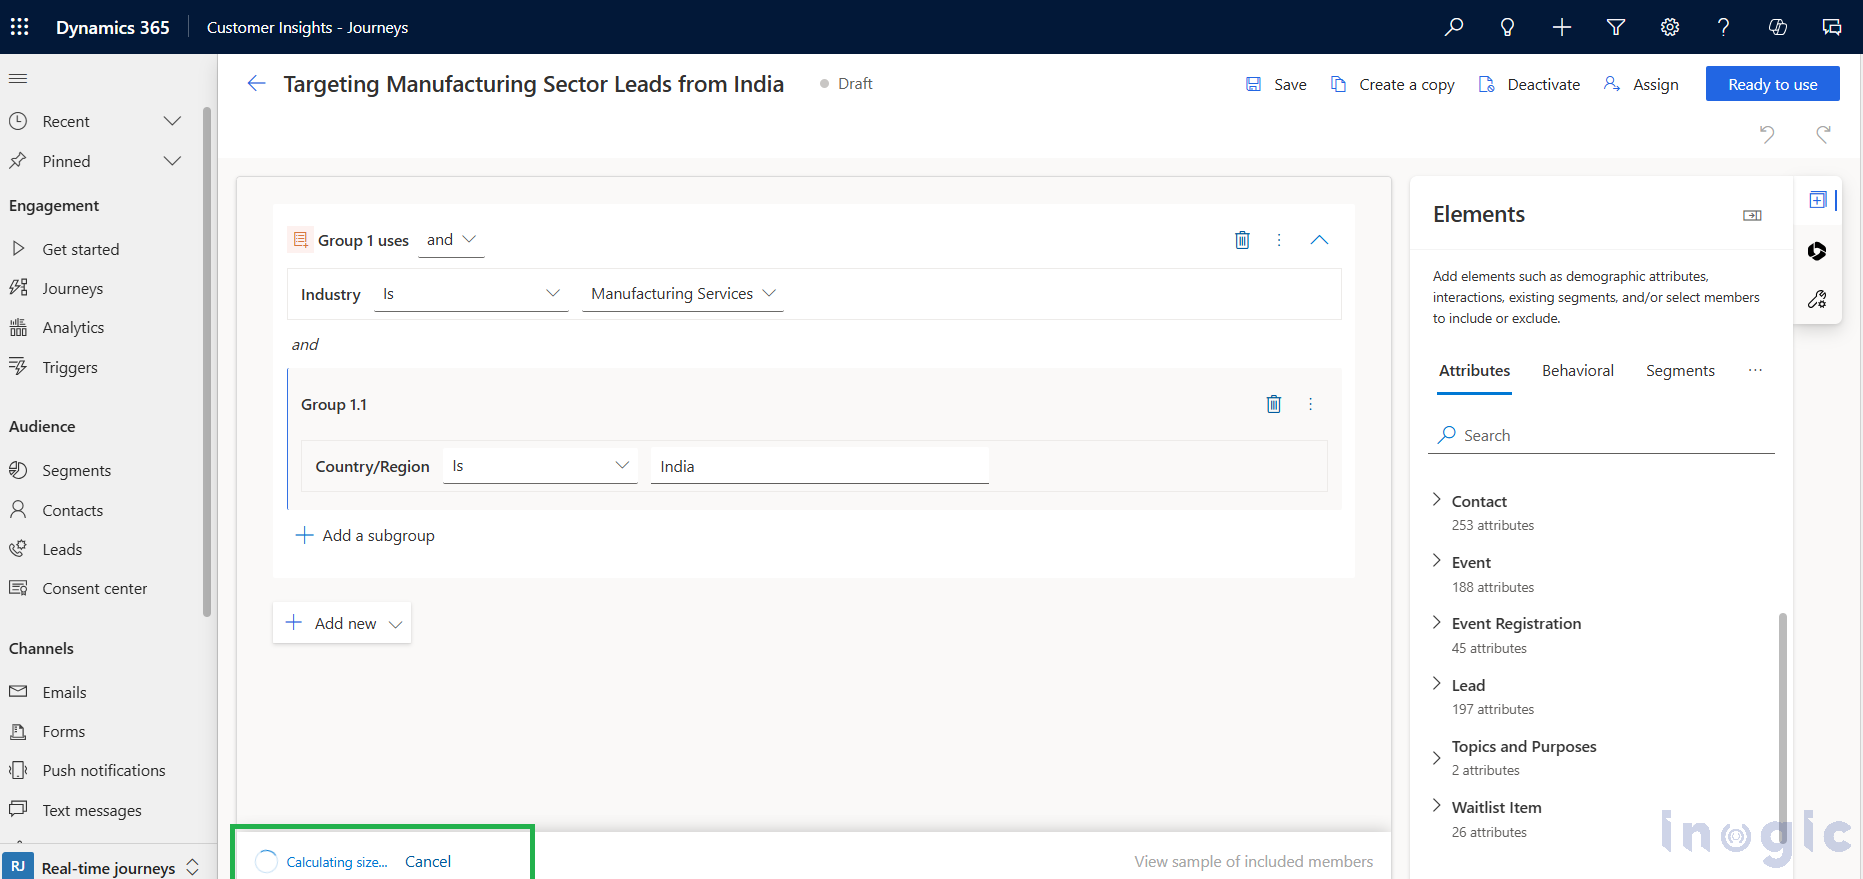
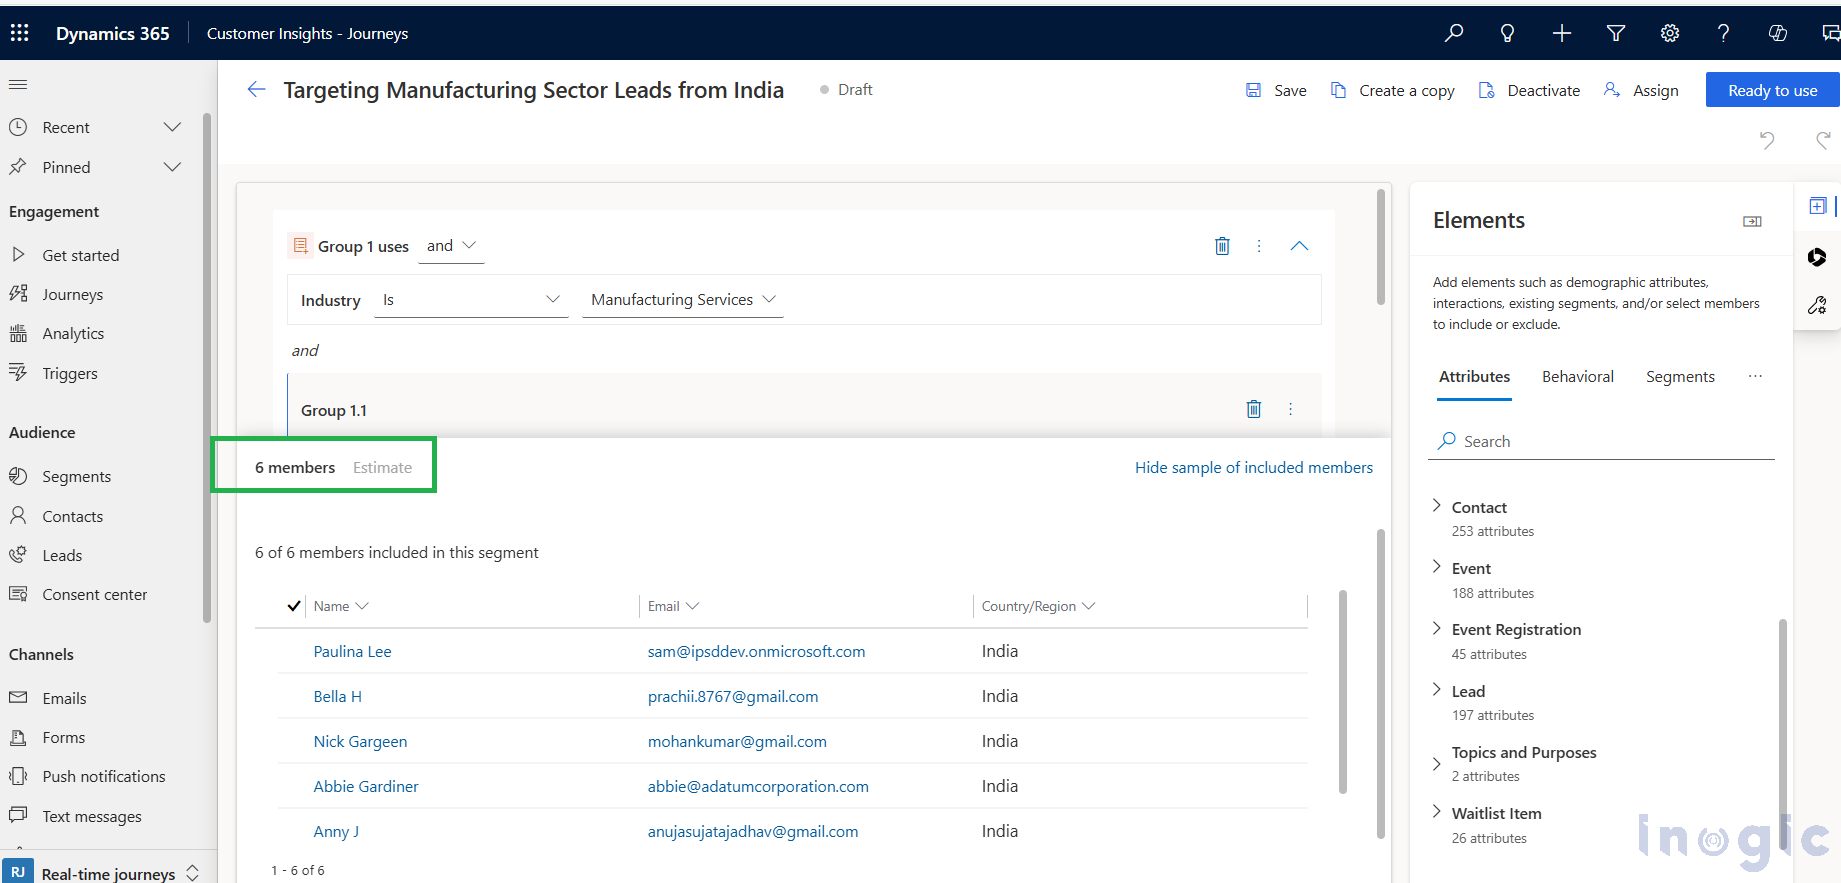
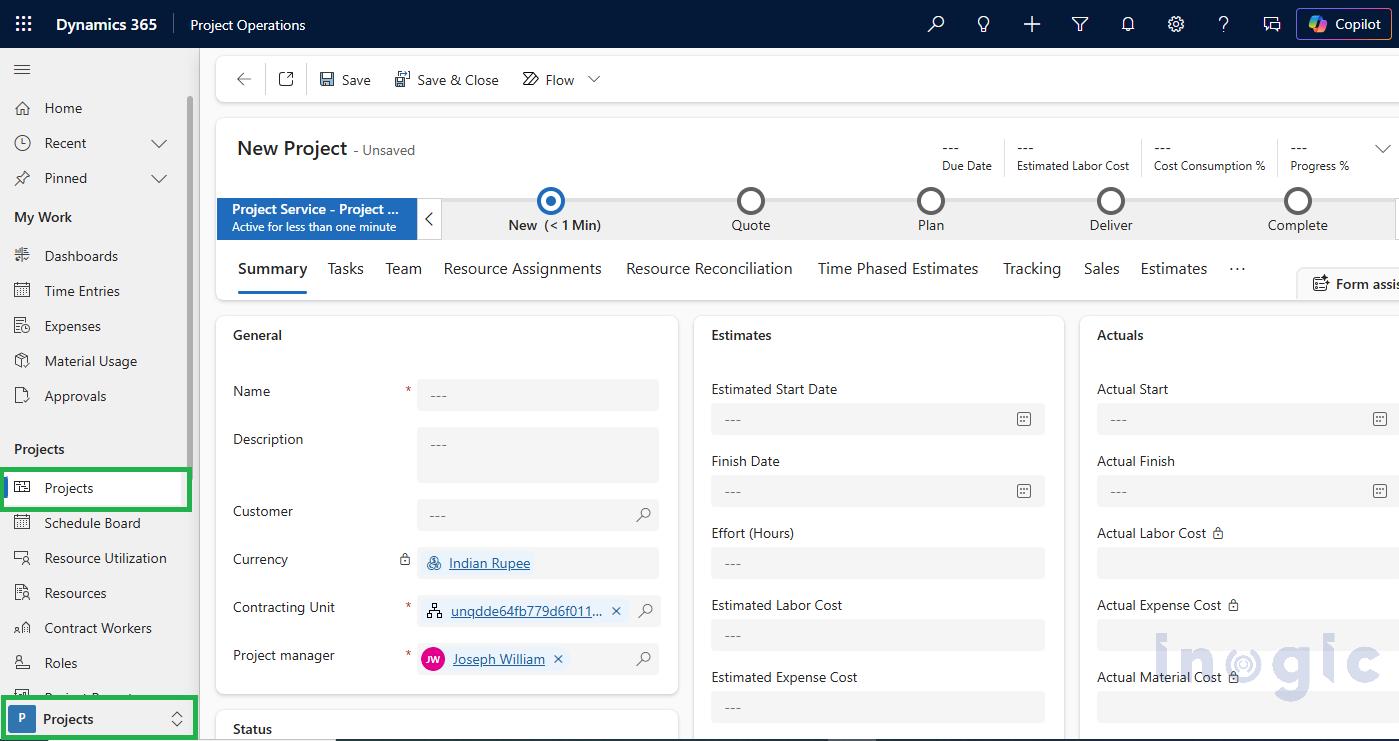
To understand the difference, I created a simple real-world test scenario inside CRM.
What Is the Difference Between Copilot Chat and Microsoft 365 Copilot?
Copilot Chat is a general-purpose AI assistant that works only with user-provided prompts.
Microsoft 365 Copilot, on the other hand, integrates with Microsoft Graph to access organizational data such as emails, meetings, documents, and CRM records allowing it to generate context-aware insights.
The Use Case: A Real CRM Opportunity
To test both Copilot experiences, I recreated a realistic opportunity inside CRM.
Here’s the setup:
- Account: Contoso Retail Group
- Primary Contact: Sarah Thompson
- Opportunity: Contoso POS Upgrade Project
To simulate a real project, I added different pieces of information across the system:
- Email conversations with the engineering team discussing migration constraints
- Opportunity notes describing the migration strategy and potential risks
- Meeting notes covering API readiness and dashboard activation timelines
- Tasks related to preparing proposals and scheduling pilot migrations
- A service case linked to the account about previous POS downtime
In short, this was a normal customer project scenario where information exists in many places.
The Prompt I Asked Both Copilots
Once everything was ready, I asked both copilots the exact same question:
“Summarize the Contoso POS Upgrade Opportunity using emails, notes, meeting notes, case details, and tasks. Include customer concerns, risks, and next steps.”
What Happened with Copilot Chat
When I asked Copilot Chat, the response was polite but limited.
It replied that Sorry, I don’t know that one yet, but I’m always learning.
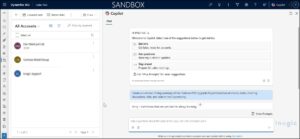 In simple terms, Copilot Chat had no visibility into the opportunity context.
Copilot Chat is still useful for tasks like:
- Writing content
- Brainstorming ideas
- Creating templates or plans
- Explaining general concepts
But when it comes to understanding your day-to-day work inside business systems, it simply doesn’t have access to the necessary information.
What Happened with Microsoft 365 Copilot
Next, I ran the same prompt using Microsoft 365 Copilot.
The difference was immediate.
In simple terms, Microsoft 365 Copilot understands your work context by connecting to organizational data across the Microsoft ecosystem through Microsoft Graph. This allows it to automatically gather insights from emails, meetings, documents, notes, tasks, files, and conversations within the Microsoft 365 environment. Using this connected context, Copilot was able to generate a much richer and more meaningful summary of the opportunity.
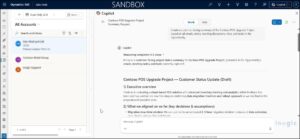 The output included insights such as:
From Emails
- Planned migration downtime window
- Deployment approach using store batches
- Customer concerns about weekend disruptions
From CRM Notes
- Engineering feedback on legacy scripts
- Risk related to unsynced transactions
- Offline billing requirements
From Meeting Notes
- API integration readiness
- Estimated dashboard activation time
From Tasks
- Preparing customer update communication
- Scheduling pilot migration
- Updating proposal documentation
From the Service Case
- Previous POS downtime incidents
- Early signs of customer frustration
The summary felt less like a chatbot response and more like something a project analyst might prepare before a stakeholder meeting.
Copilot Chat vs Microsoft 365 Copilot: Key Differences
| Feature | Copilot Chat | Microsoft 365 Copilot |
| Access to CRM Data |  No No |
 Yes Yes |
| Microsoft Graph Integration | No |
Yes |
| Context Awareness | Primarily in‑chat only | High |
| Data Sources | Manual input only | Emails, meetings, CRM, tasks |
| Best Use Case | Writing & brainstorming | Business workflows & decision-making |
Why This Matters for CRM Professionals:
CRM work rarely lives in a single record.
Important information about a customer often exists across:
- emails
- meetings
- internal discussions
- notes
- cases
- tasks
To truly understand the situation, you need to connect all those pieces together.
That’s exactly what Microsoft 365 Copilot is designed to do.
Instead of analyzing one piece of information at a time, it can combine insights from multiple sources and provide a complete picture of the situation.
Copilot Chat, on the other hand, only understands the information you manually paste into the chat window.
Final Thoughts
Copilot Chat and Microsoft 365 Copilot may look similar, but they serve very different purposes.
Copilot Chat is great for general AI assistance like writing, brainstorming, and answering questions.
Microsoft 365 Copilot, on the other hand, connects directly to your organization’s data and understands the context of your work.
For professionals working in sales, consulting, customer service, or project delivery, that difference can dramatically improve productivity.
Instead of manually gathering information from multiple systems, Microsoft 365 Copilot helps you see the full picture and act faster.
And in customer-facing roles, having that complete context can make all the difference.
FAQ: Copilot Chat vs Microsoft 365 Copilot
Q: Can Copilot Chat access Dynamics 365 CRM data?
No, Copilot Chat cannot access CRM data unless you manually provide it in the prompt.
Q: What makes Microsoft 365 Copilot different?
Microsoft 365 Copilot integrates with Microsoft Graph to access emails, meetings, documents, and CRM data, enabling context-aware insights.
Q: Is Microsoft 365 Copilot worth it for CRM users?
Yes, especially for sales, service, and consulting teams who rely on insights across multiple systems.
The post Microsoft 365 Copilot vs Copilot Chat: Key Differences for Dynamics 365 CRM Users first appeared on Microsoft Dynamics 365 CRM Tips and Tricks.
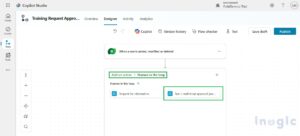
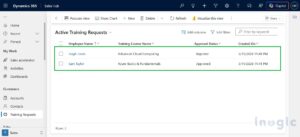
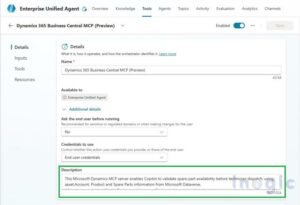
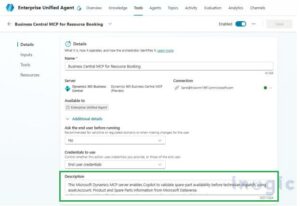
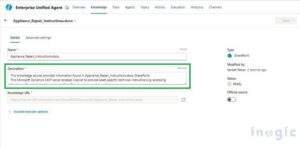
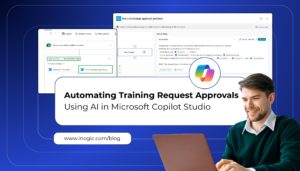 Organizations frequently receive employee requests for training programs, certifications, or skill-development courses. Traditionally, these requests go through manual review and approval processes which can delay decision making and create administrative overhead.
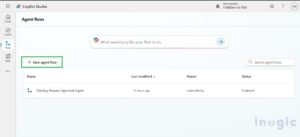
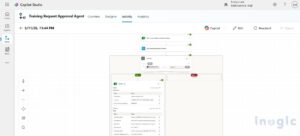
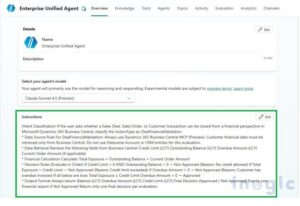
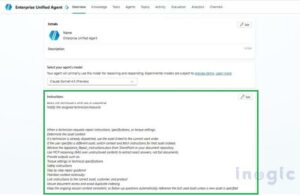
 Run a multistage approval (preview) configuration screen
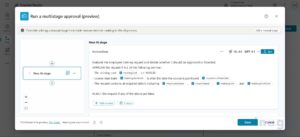 AI instruction configuration inside the Evaluate Request stage
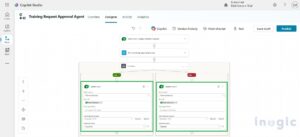
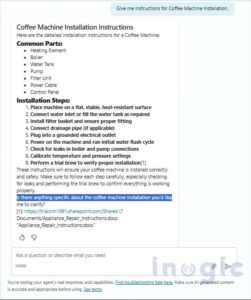
 Dataverse Update Row action flow when all conditions are met / true
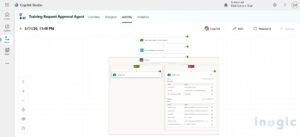
 Today’s businesses rarely operate within a single application. Applications such as Sales Hub, which manage leads, opportunities, accounts and revenue to help sales teams close deals faster. On the other hand, Customer Service helps handle cases, tickets and customer support interactions to deliver faster issue resolution. Field Service is used to schedule technicians, manage work orders and track on-site services efficiently. Marketing Automates campaigns, emails, and customer journeys to generate and nurture leads. Project Operations plans, tracks, and bills projects by combining project management, resources, and financials in one system.


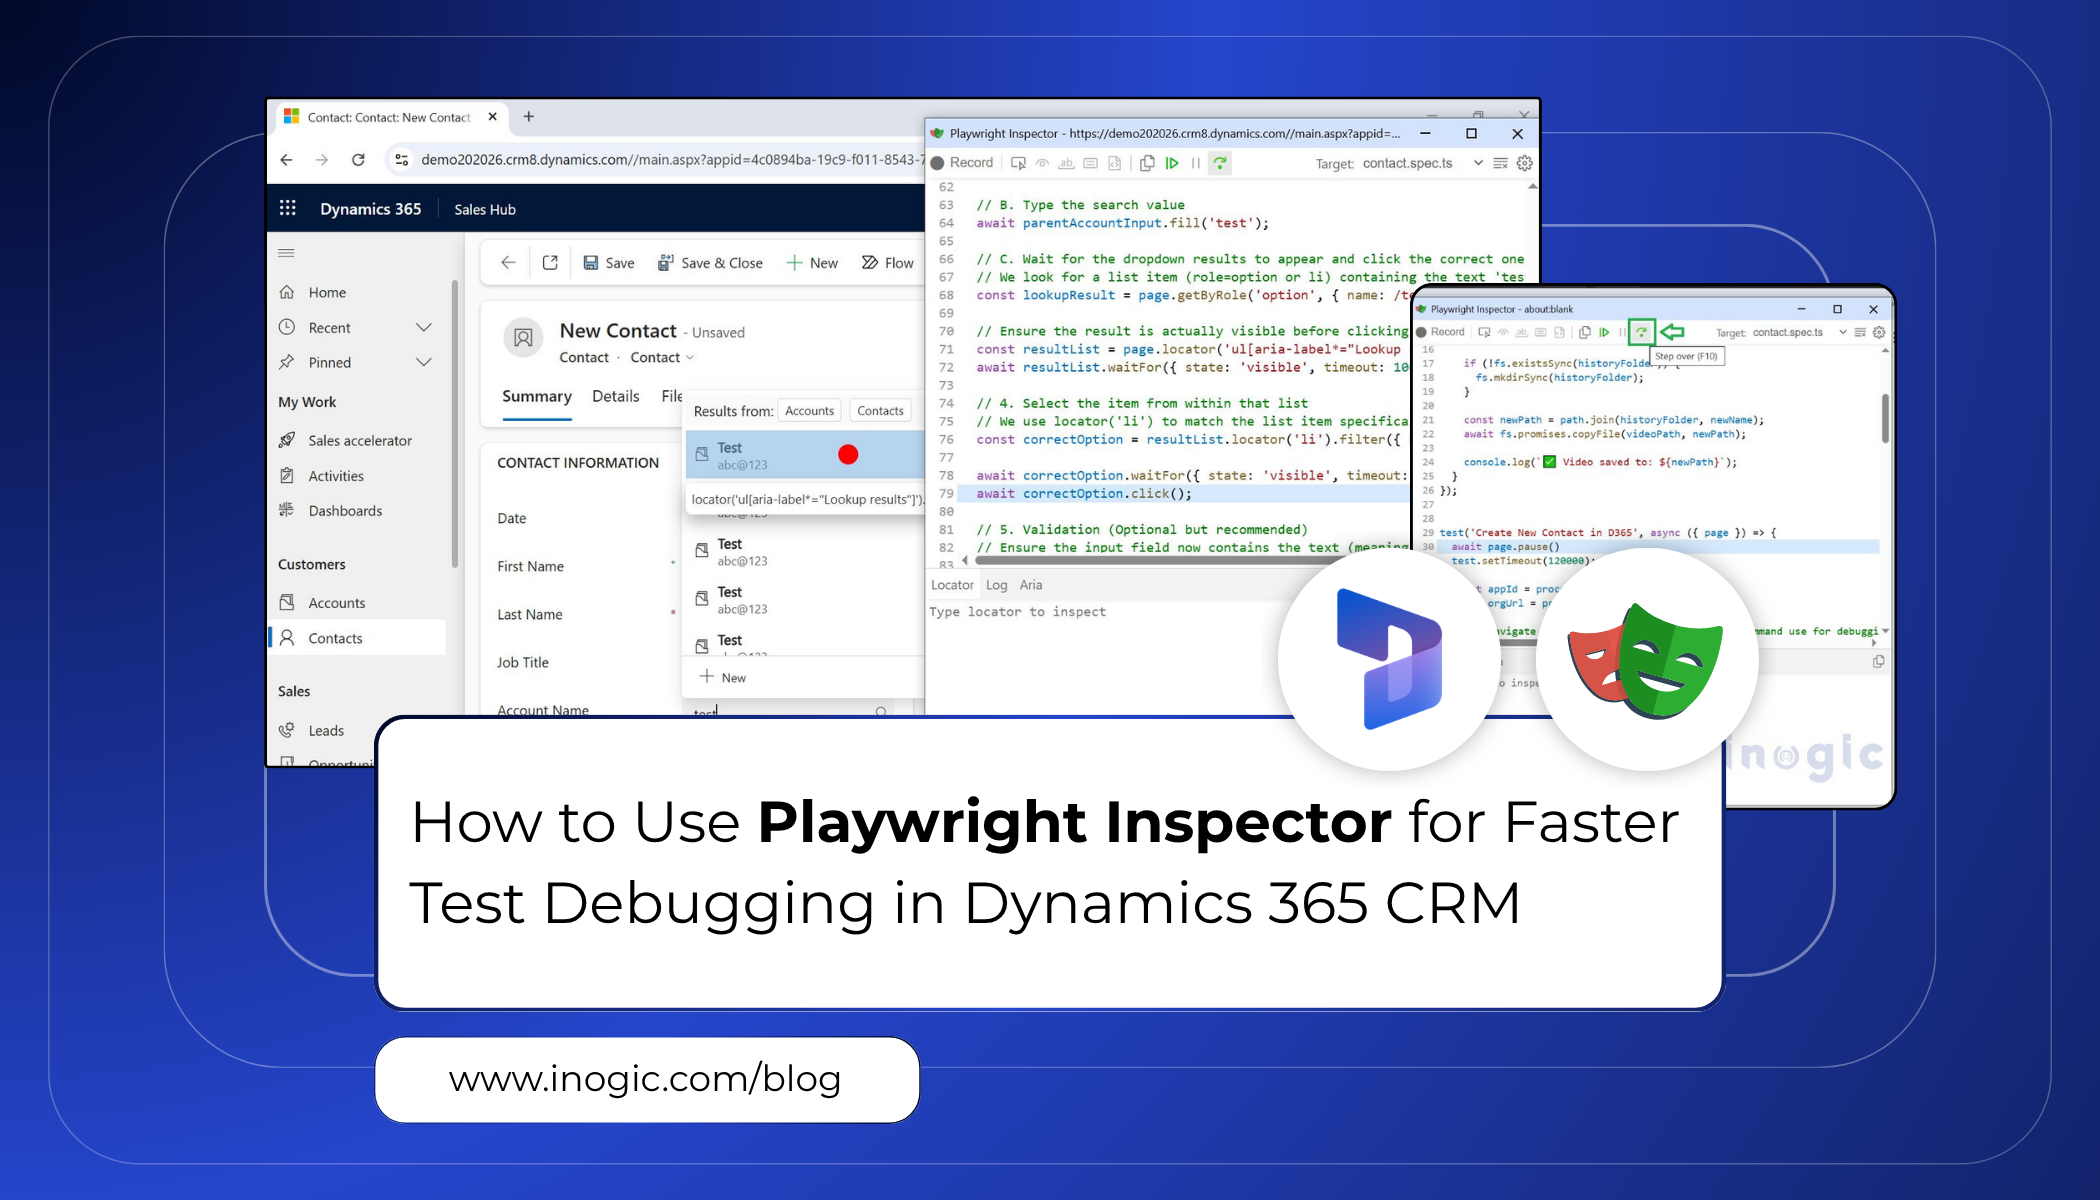
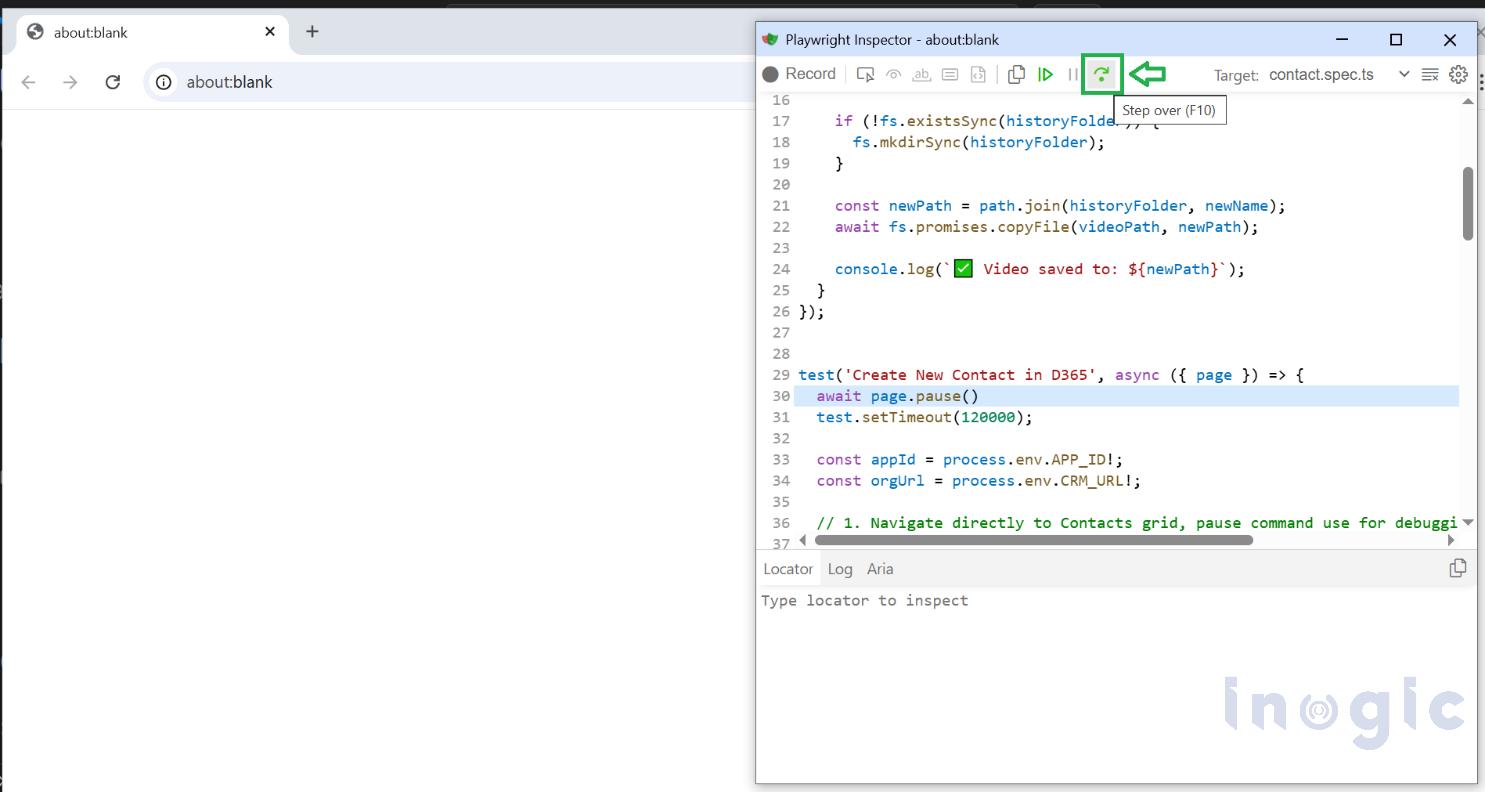 You can see the current action highlighted in the test code, and matching elements highlighted in the browser window.
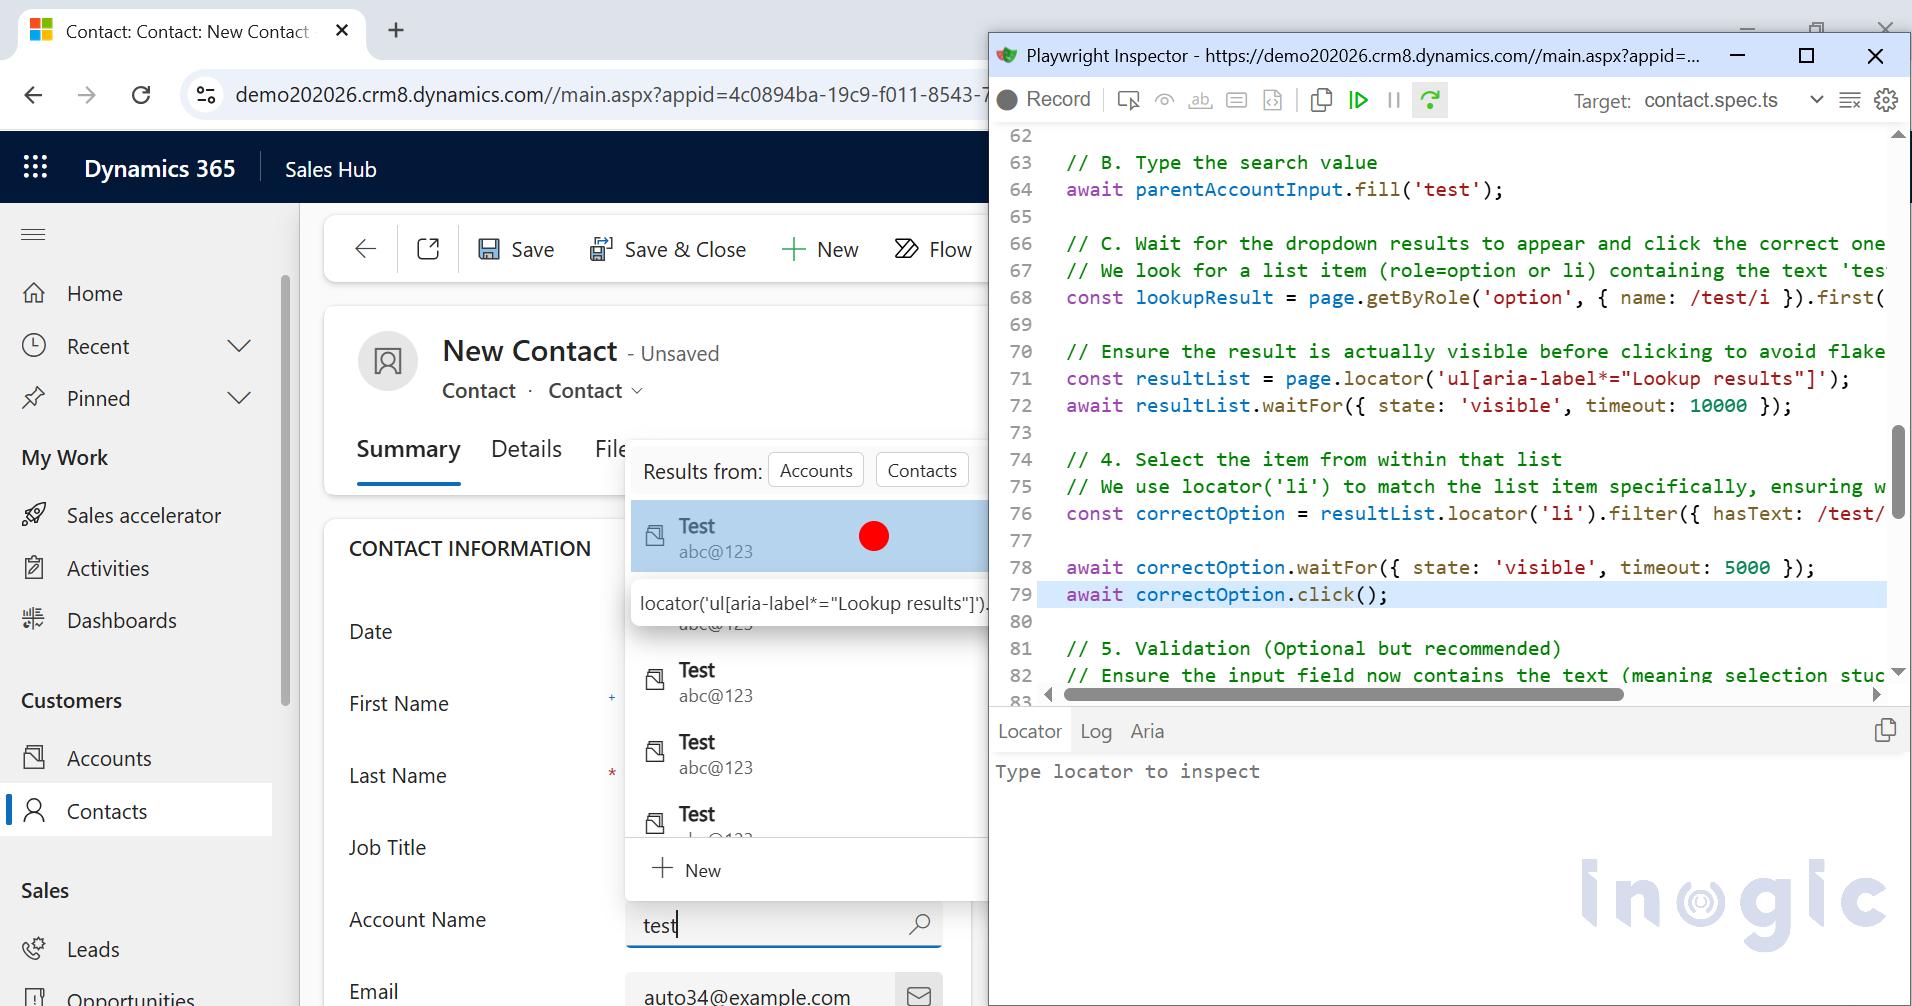 Pick Locator:
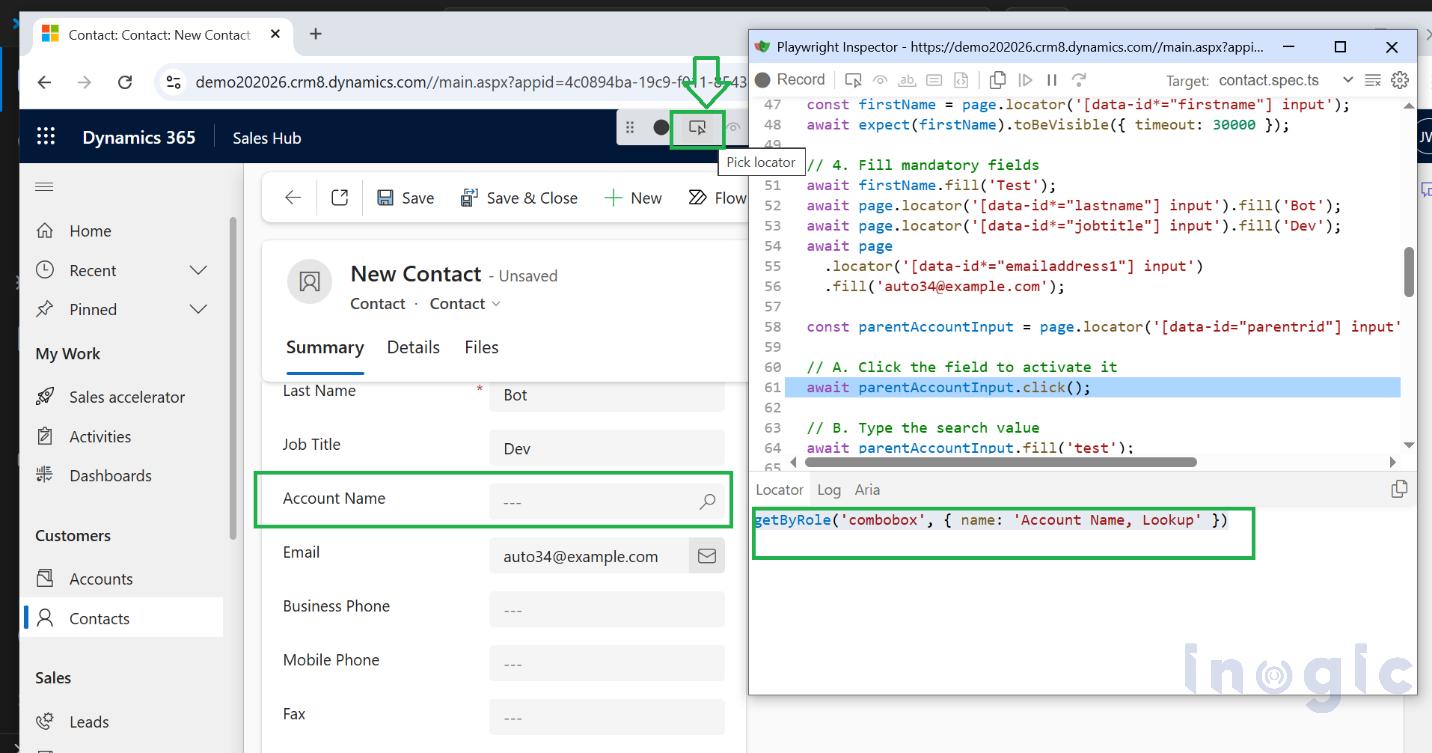 Record feature:
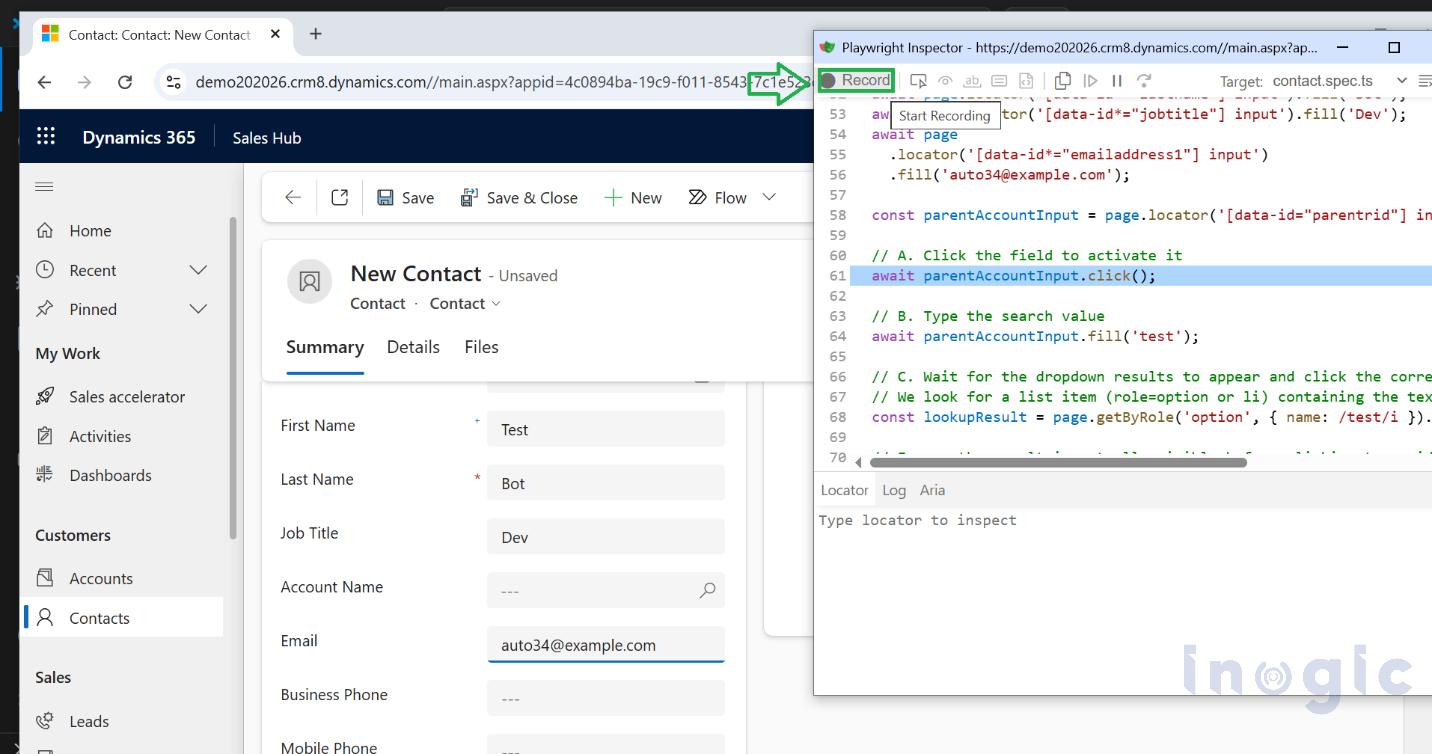 When started recording you will be able to locate the element start filling in data and can view generated code.
 The new Playwright Inspector window opens up where the recording code can be viewed and can be copied in the existing code.
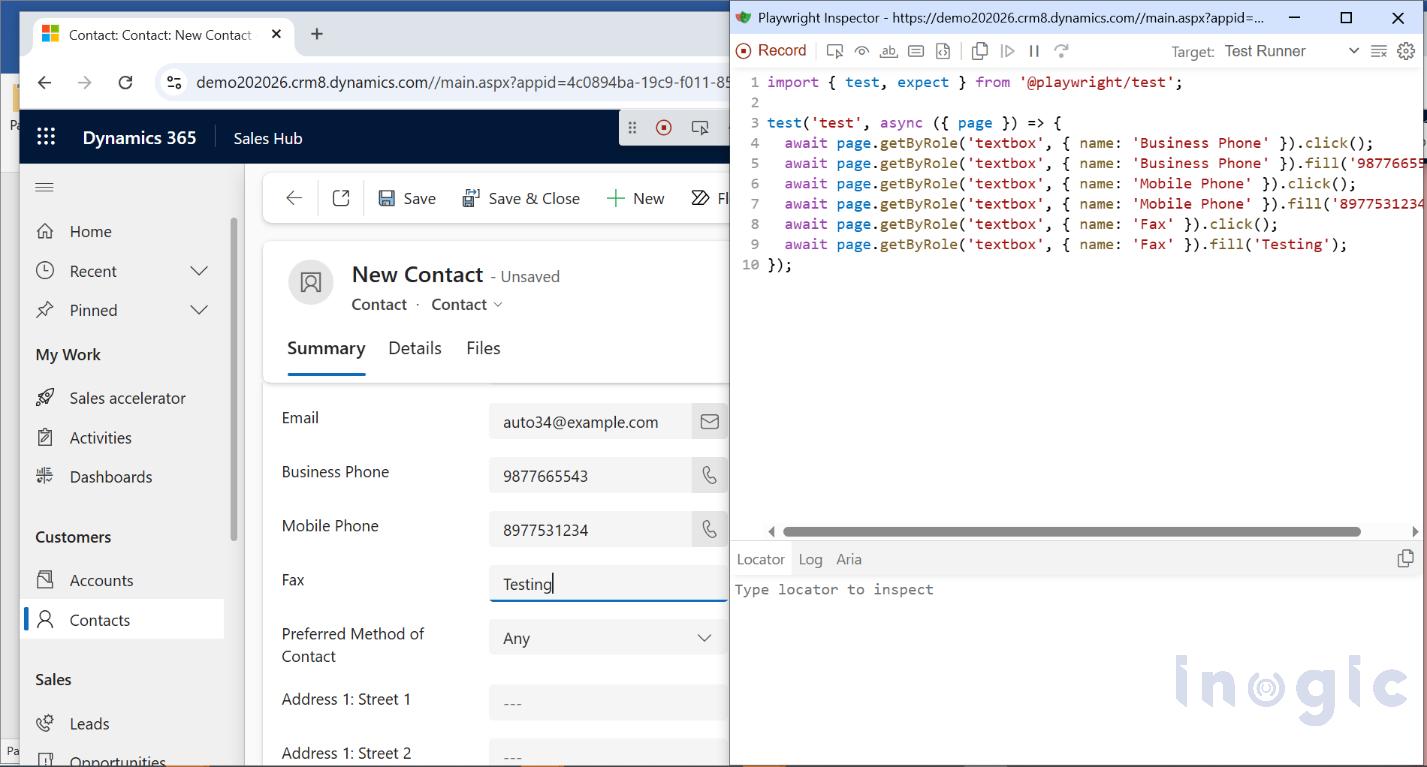 You can explore more about Playwright locators
  If you’ve been working with AI in your business processes lately, you’ve probably run into a really frustrating roadblock: the gap between the chatty text an AI wants to give you and the structured data your automation actually needs.
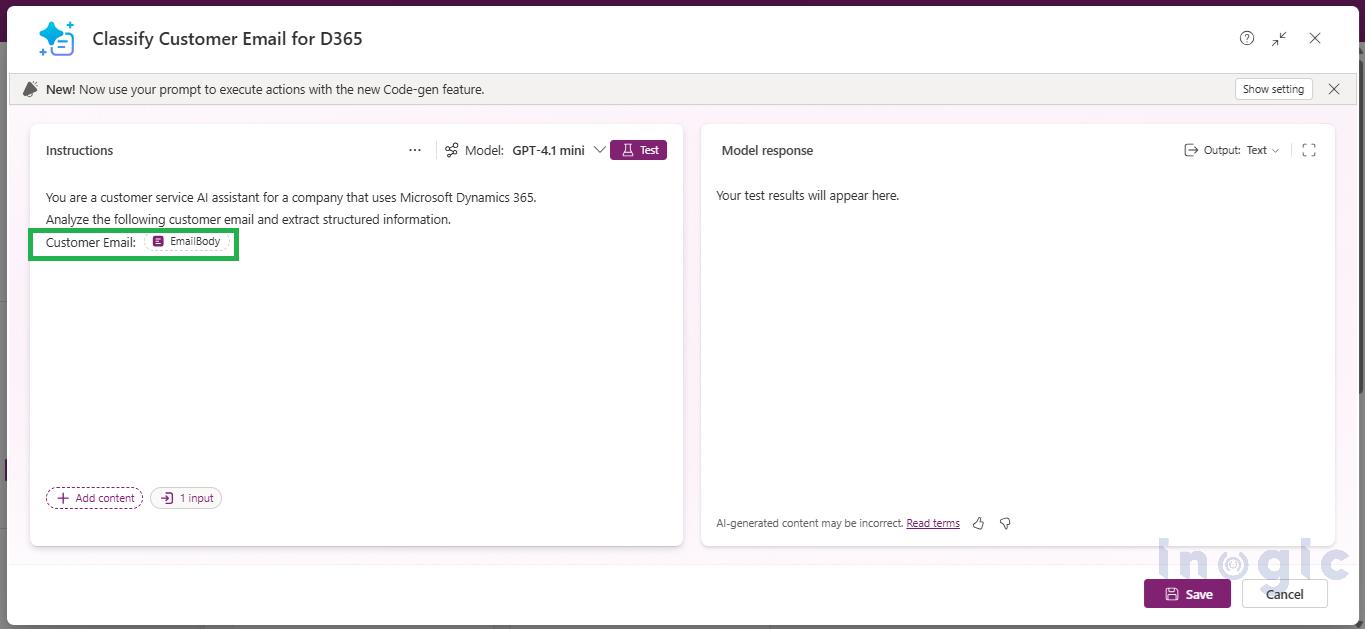
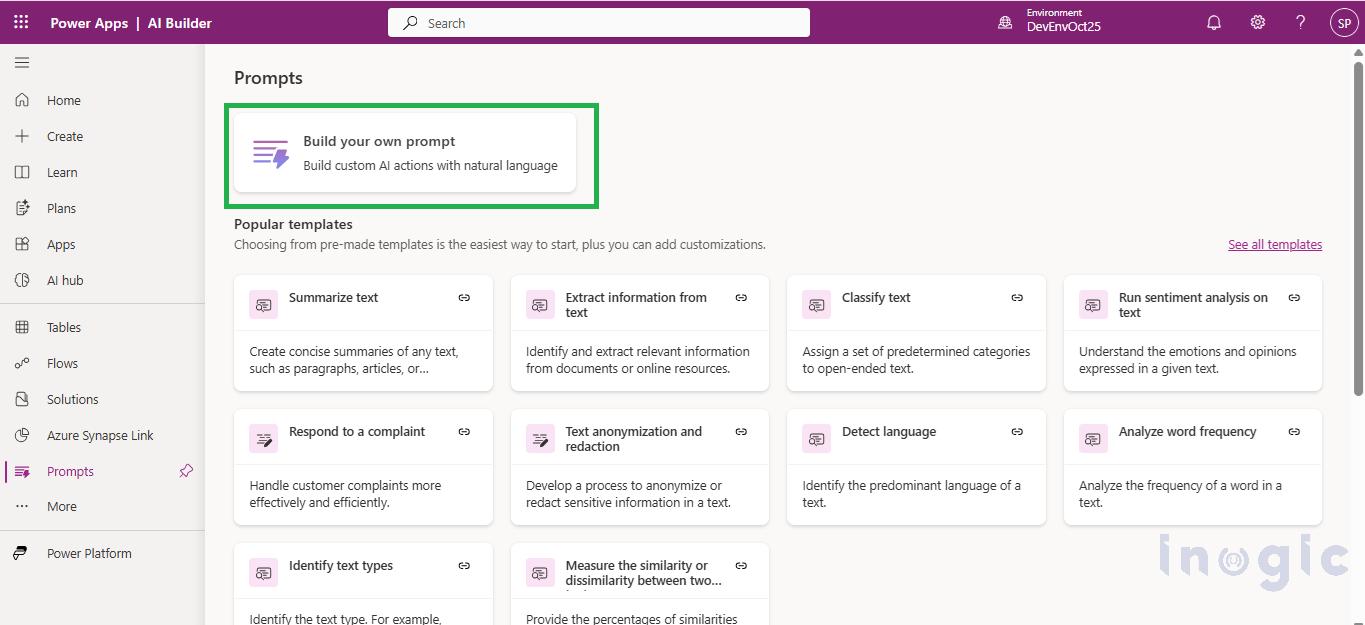 When writing the prompt, three elements are essential: a clear task definition, the JSON schema (field names, data types, allowed values), and explicit output constraints (return only the JSON, no extra text or formatting). Define dynamic inputs by clicking on Input, for example, an ‘EmailBody’ variable to hold customer email text passed from a flow.
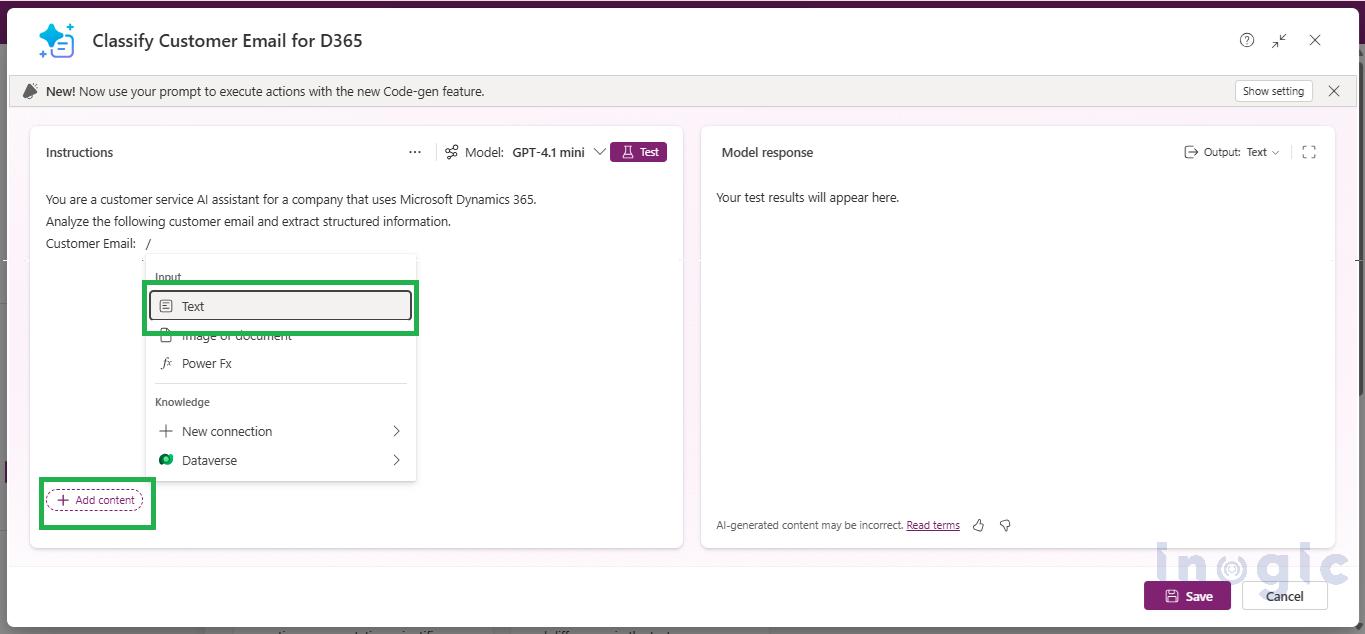
 In the configuration panel, change the Output format from Text to JSON. Use the built-in Test feature to validate the response structure.
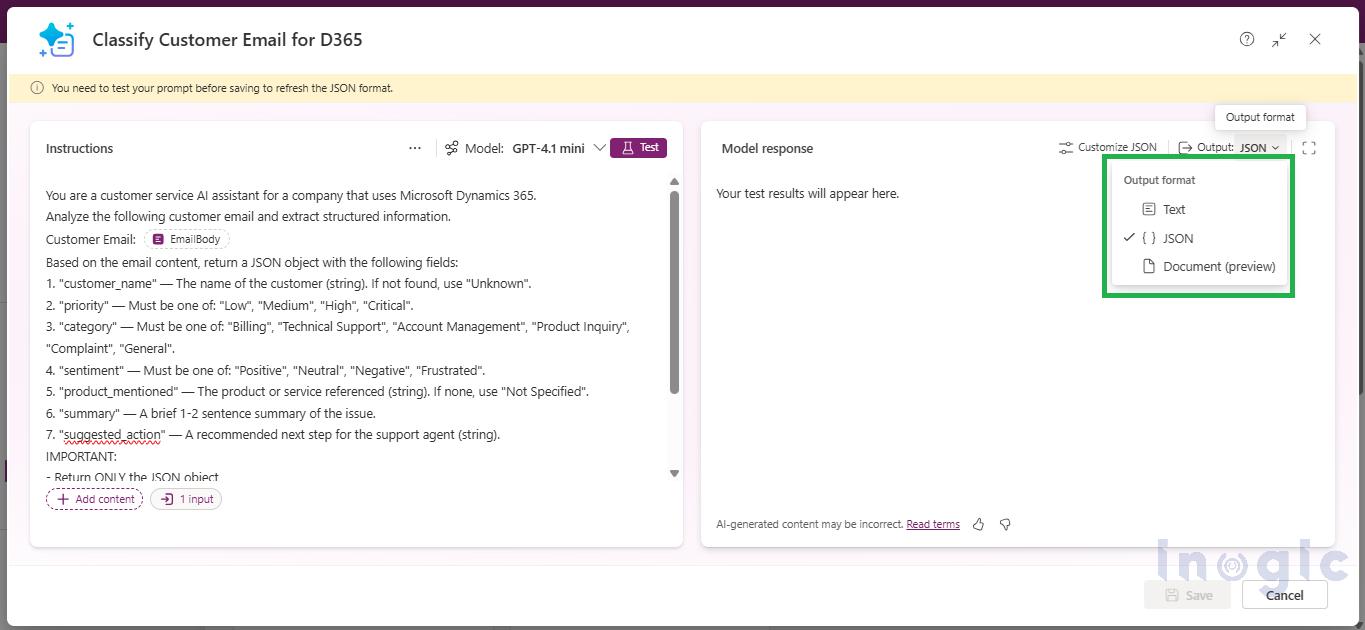
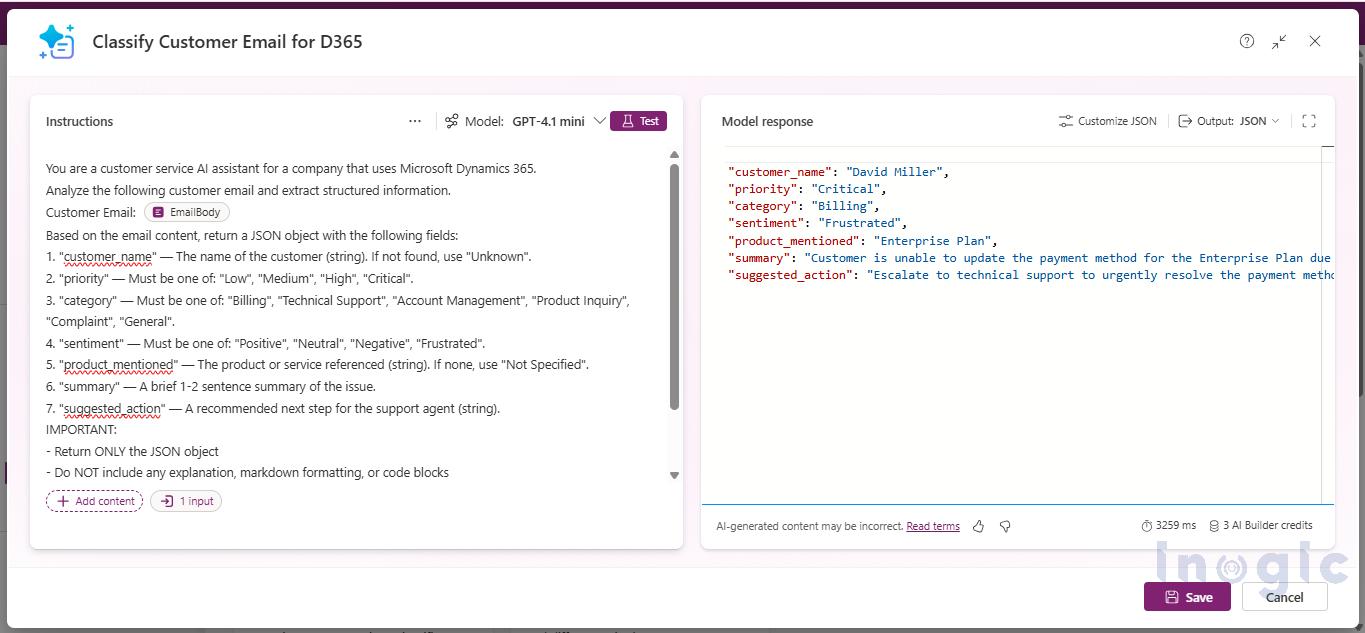 Once tested, integrate it into Power Automate via the “Run a prompt” action, or into Copilot Studio as a Prompt Tool directly or use it within a topic.
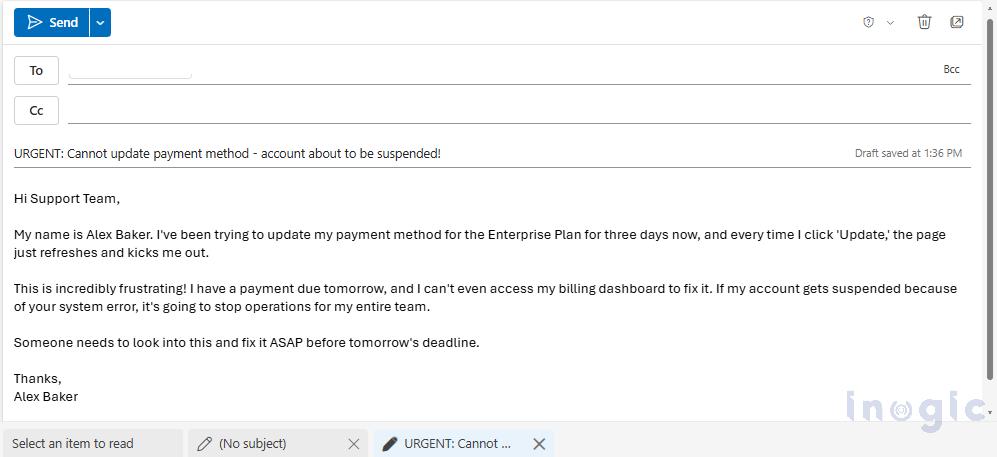 – The Prompt Analyzes: Your flow triggers immediately, grabs that email text, and ships it over to the AI Builder Prompt you built.
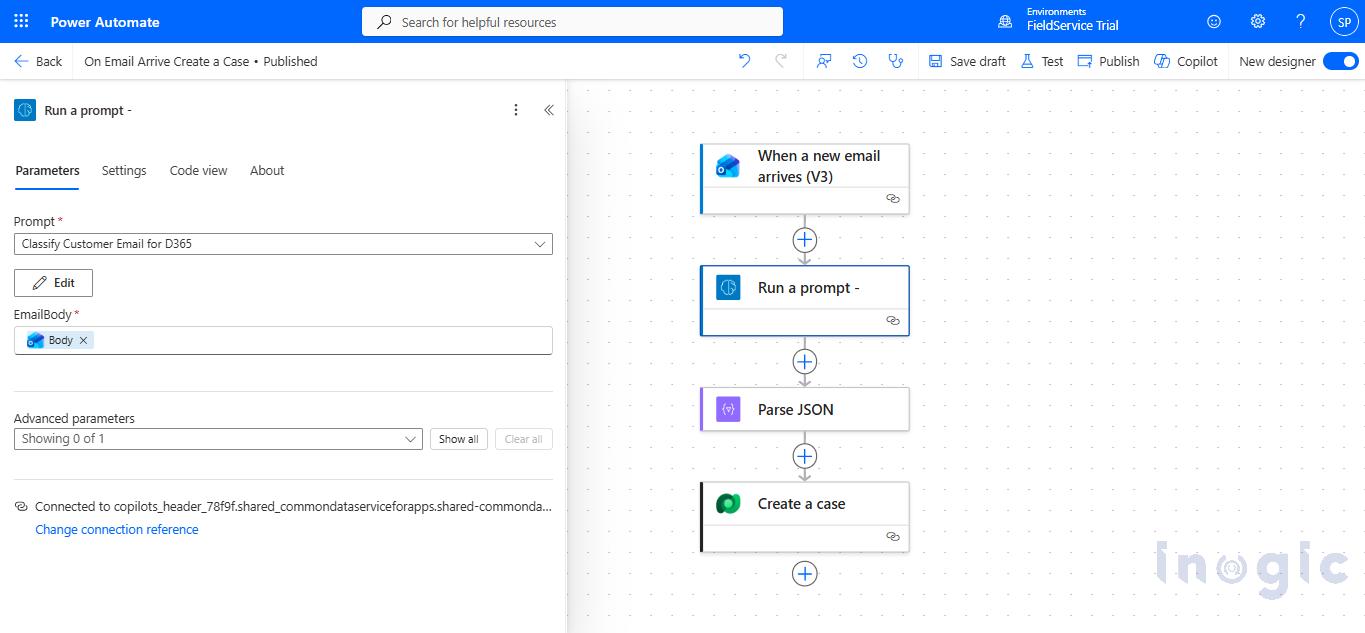 – Clean Data is Structured: The AI reads it, understands the context, and hands you back a neat JSON block.
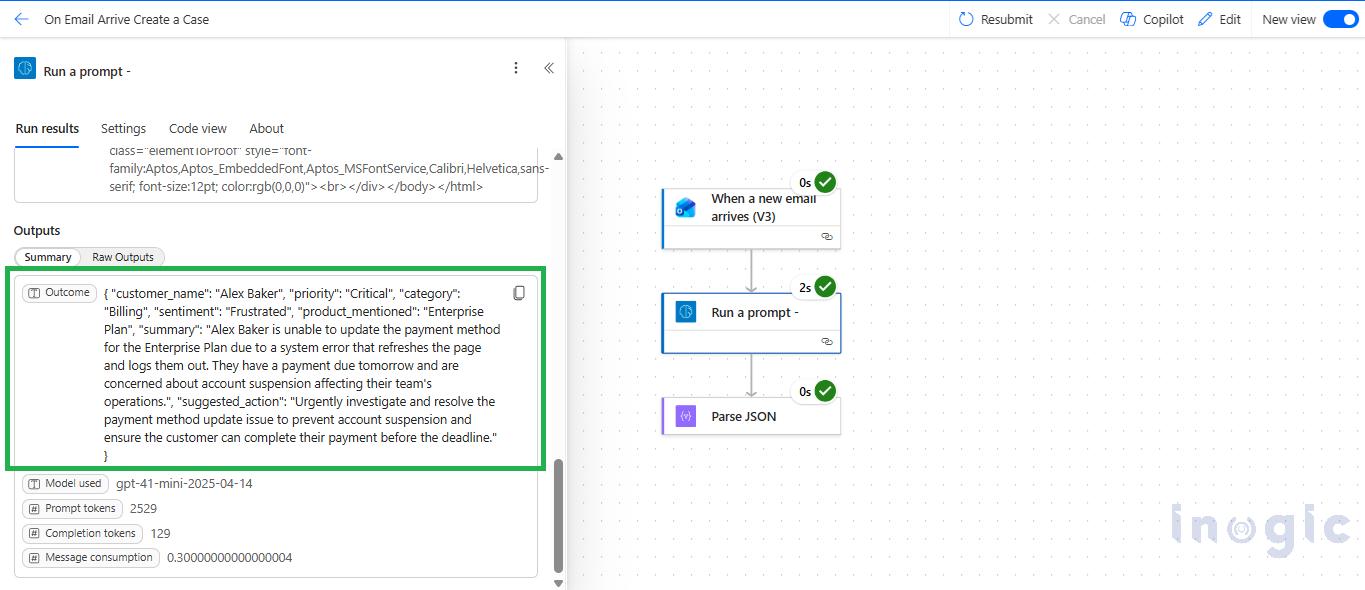 – Parsed for Automation: Using the “Parse JSON” action in Power Automate, the structured data is instantly converted into dynamic content. You can now use these variables anywhere in your flow to route the email to the right team, trigger an urgent alert, or seamlessly create a record in Dataverse.
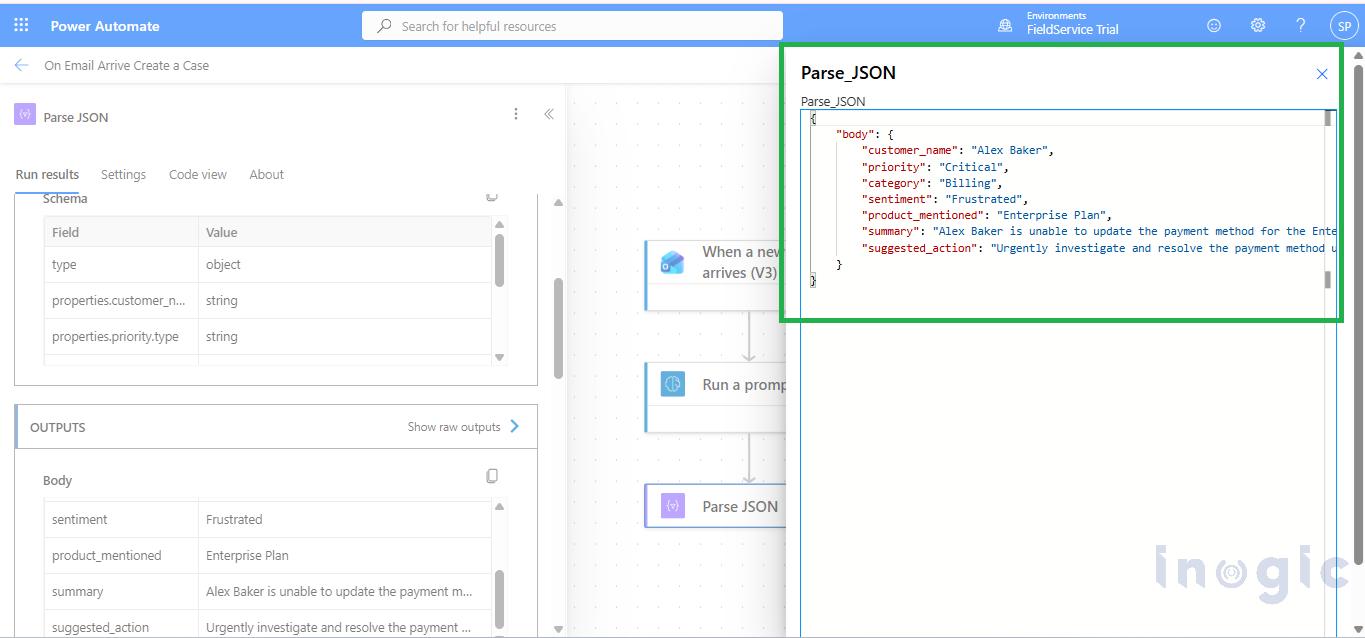 Conclusion


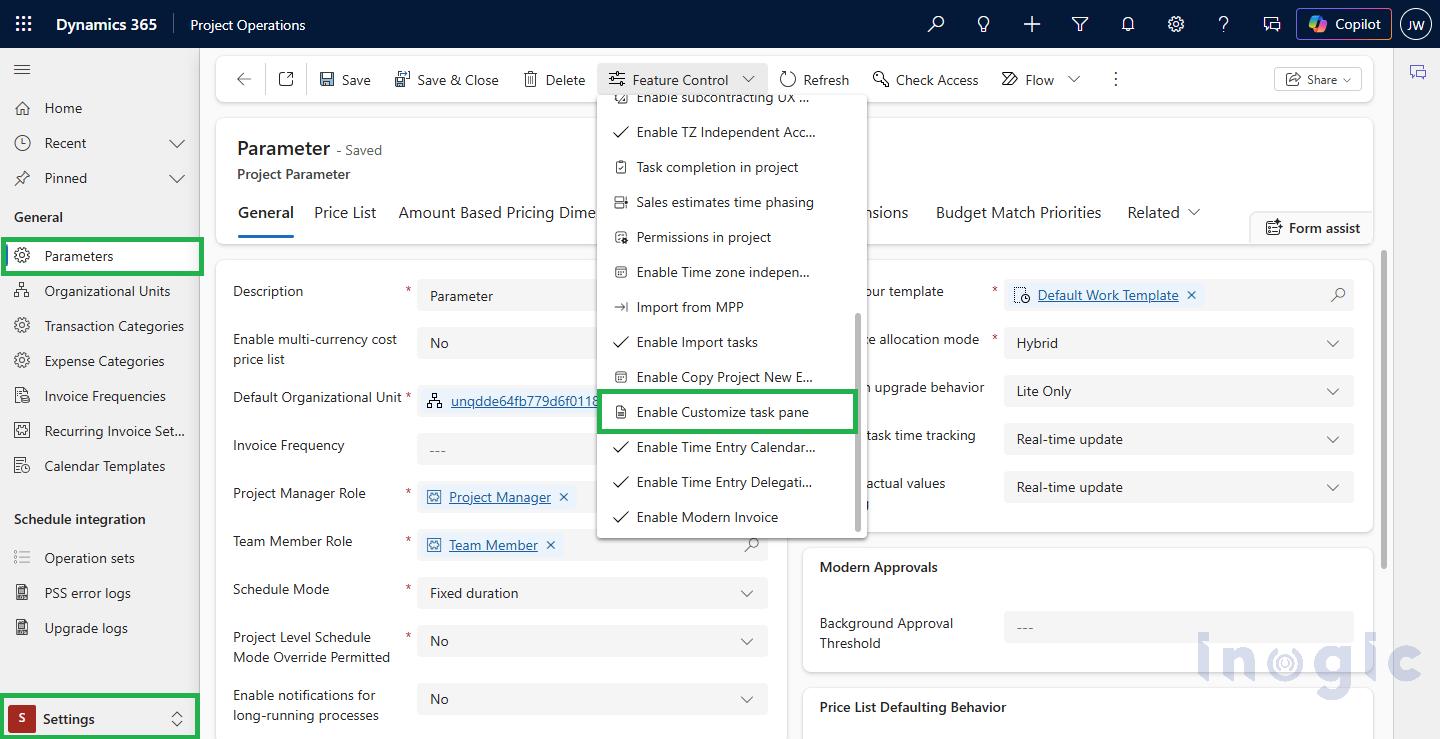
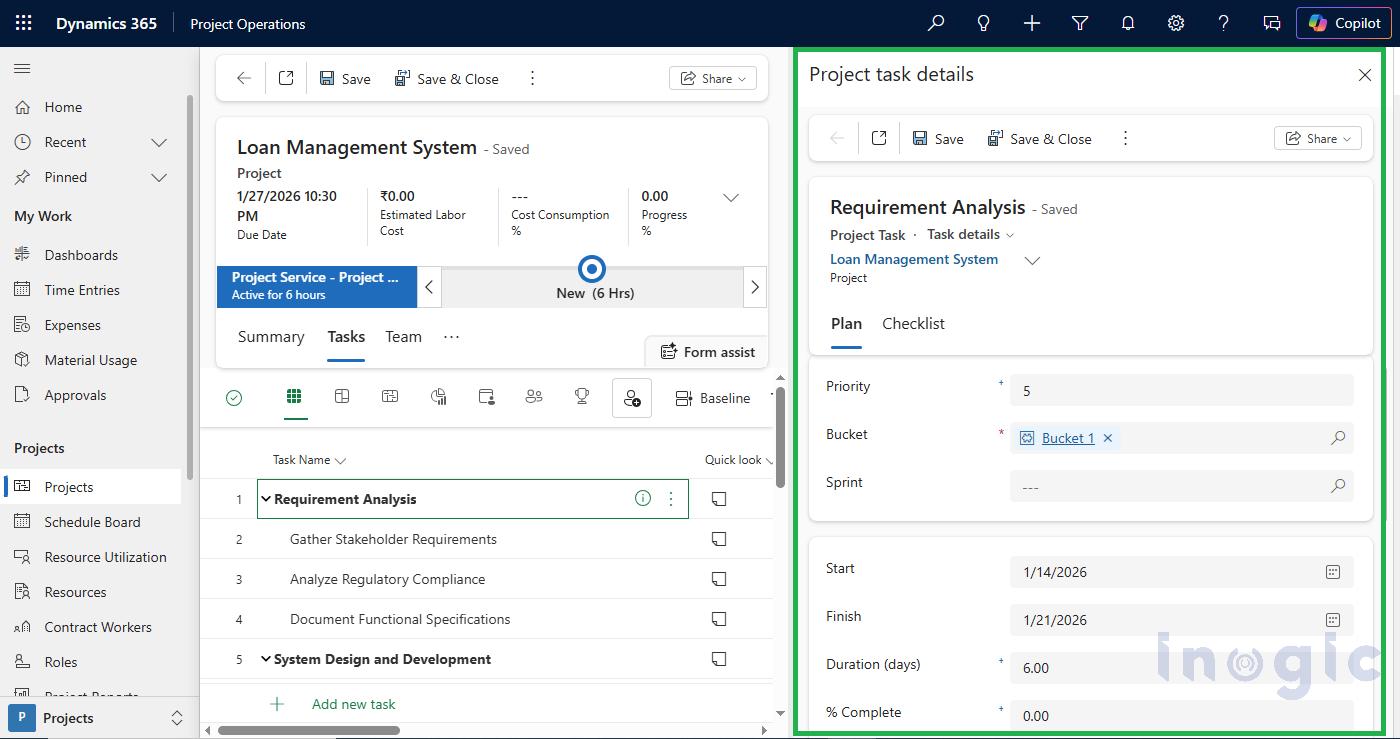
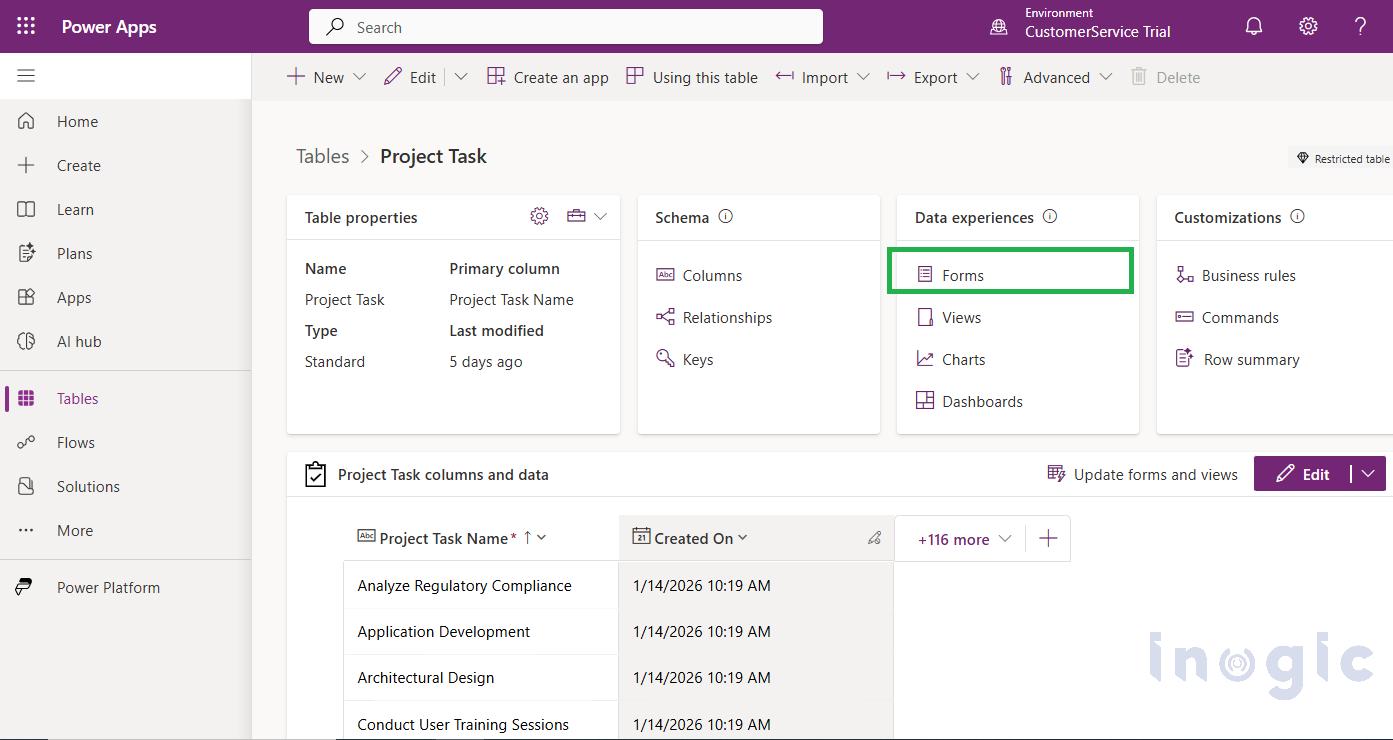
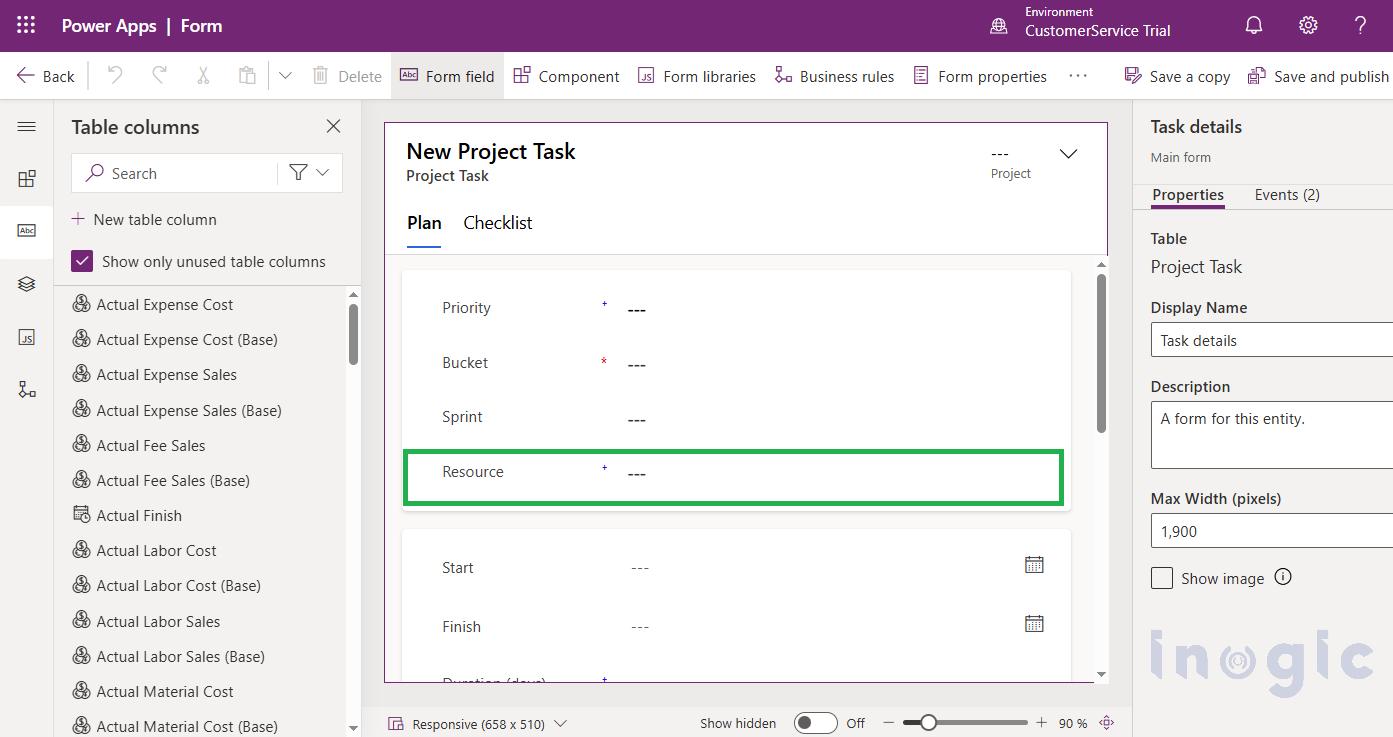
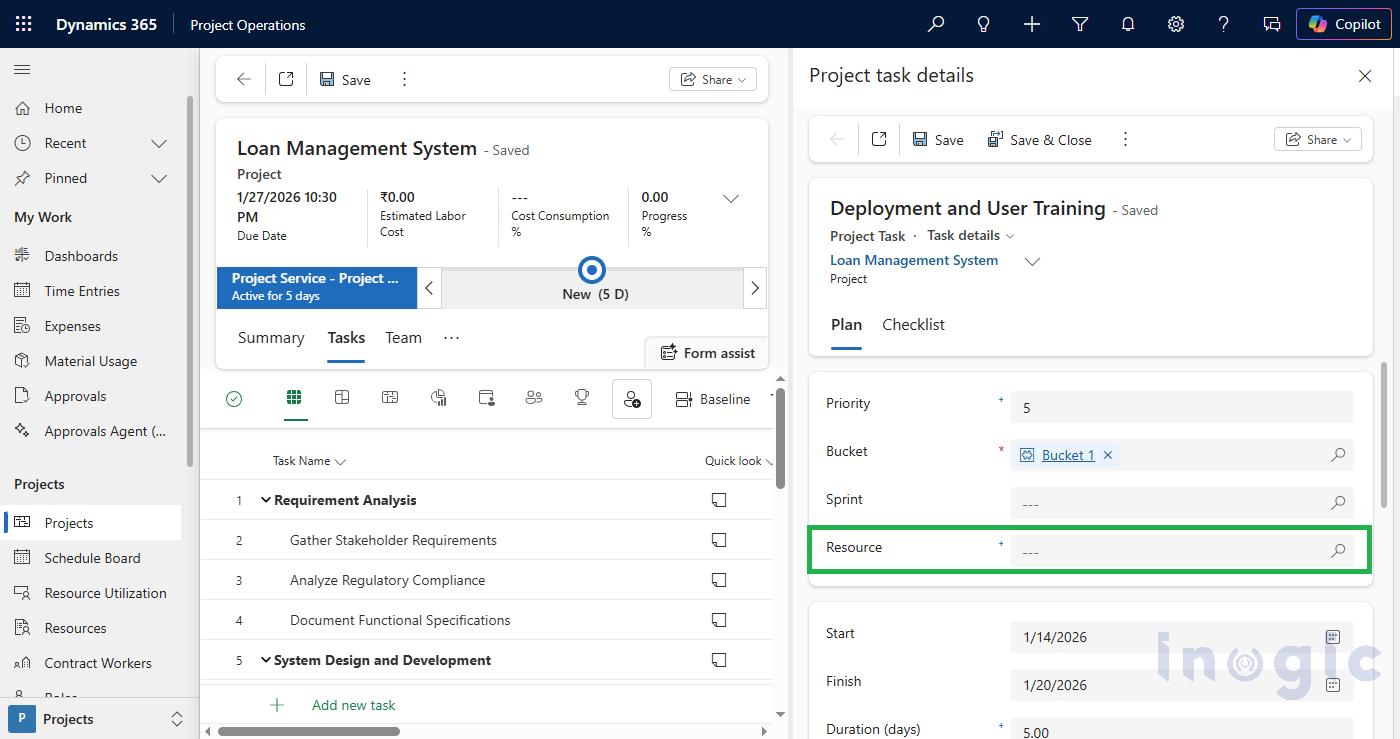 Note: Resource field added in Task details form is visible in Task Pane.